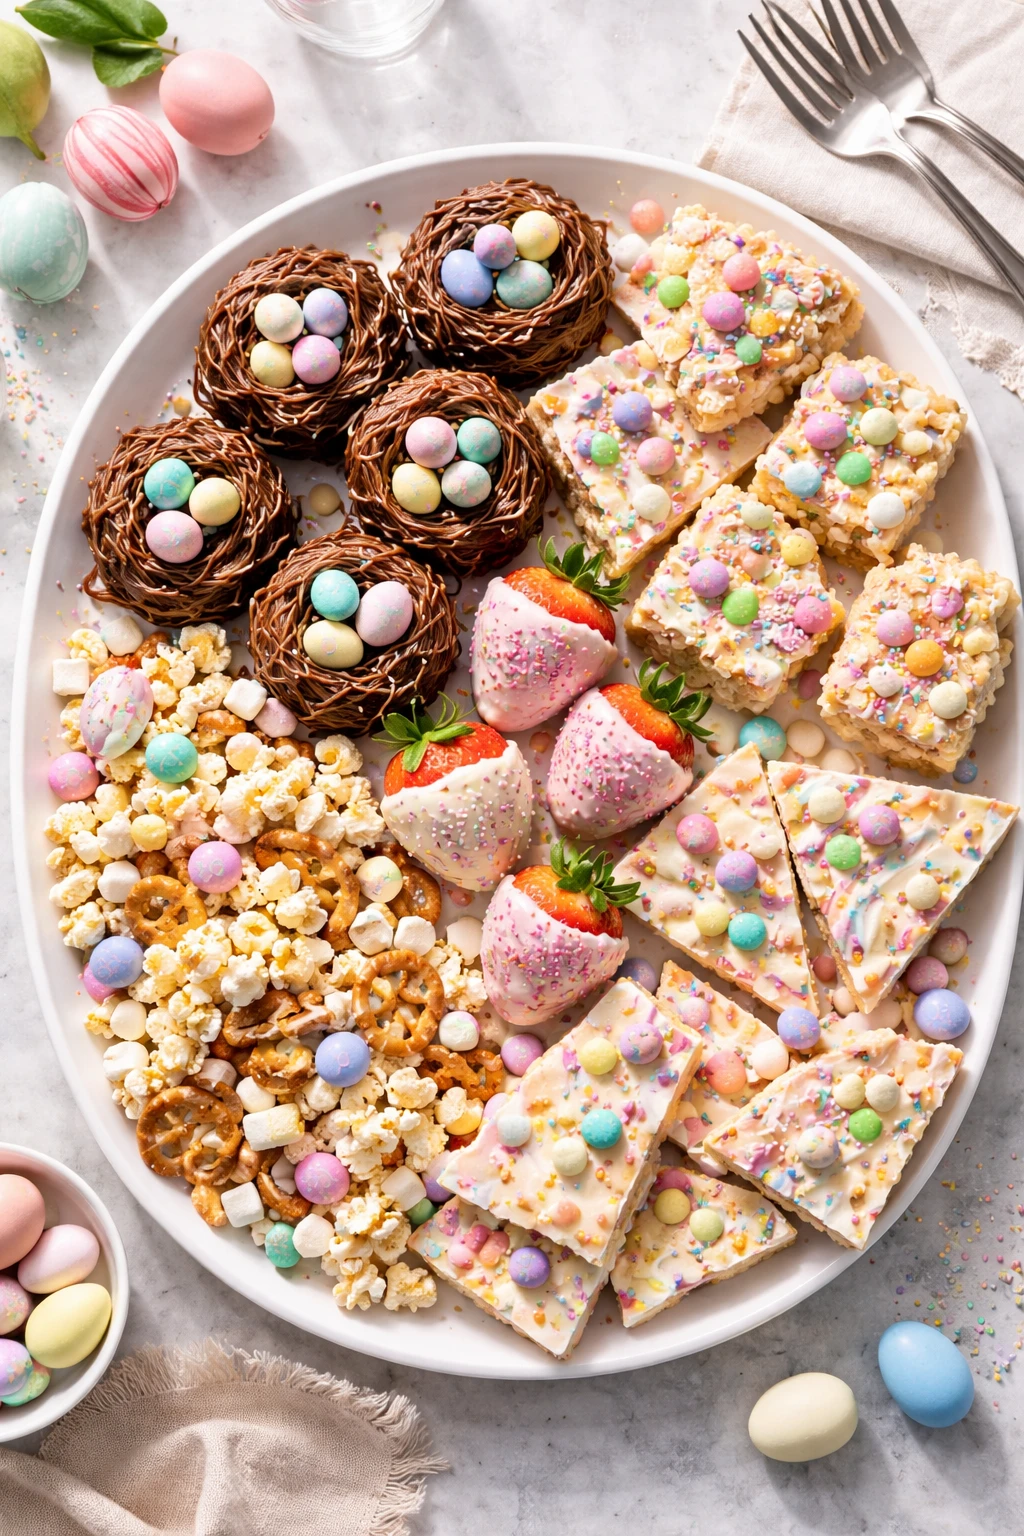
These adorable Easter treats come together super fast and bring a burst of color to your table. Using simple ingredients and fun decorations, they’re perfect for last-minute family celebrations or a sweet snack anytime!
Introduction
I stumbled upon this quick Easter treat idea a few years ago when I realized I had almost no time to prepare snacks for a family gathering. I wanted something festive but fuss-free, so I started experimenting with simple ingredients I already had. What makes this version special is the use of melted white chocolate mixed with vanilla extract to bind colorful candies and marshmallows, giving each bite a creamy, sweet pop of flavor. The crushed graham crackers add a subtle crunch that balances the softness perfectly. I also love how you can customize these with any decorations you have on hand — it’s a fun activity to do with kids, too! The best part? They come together in just 15 minutes, no baking required. The finished treats look charming and colorful, making them a perfect last-minute addition to your Easter table or a cheerful snack anytime you want a quick festive fix.
What You'll Need
Approximately 12 small treats, 6 servings
- 1 cup mini marshmallows, fresh
- 1 cup colorful candy-coated chocolates
- 1 cup white chocolate chips, melted
- 1 teaspoon vanilla extract
- 1/2 cup crushed graham crackers
- Assorted edible decorations (sprinkles, edible glitter, small candy eyes)
How To Do It
Step 1
Start by melting the white chocolate chips gently in a microwave-safe bowl in 30-second intervals, stirring in between. This slow melting prevents the chocolate from burning and keeps it smooth. Once melted, stir in the vanilla extract to add depth and warmth to the flavor. The melted chocolate acts as a glue to hold all the ingredients together, so it’s important that it’s smooth and fluid but not too hot to avoid melting the candies later.
⏱ Time: 5
✓ Doneness: Chocolate is fully melted, glossy, and smooth with no lumps.
Step 2
In a large mixing bowl, combine the mini marshmallows, candy-coated chocolates, and crushed graham crackers. Pour the melted white chocolate mixture over the top and gently fold everything together with a spatula. Be careful not to overmix or crush the candies; the goal is to coat everything evenly without breaking the pieces. This step ensures each treat will have a balanced texture and vibrant colors.
⏱ Time: 3
✓ Doneness: All ingredients are evenly coated with chocolate, mixture looks colorful and sticky.
Step 3
Line a baking sheet with parchment paper. Using a spoon, scoop small mounds of the mixture onto the sheet. You can make them as big or small as you like, but keeping them uniform helps with even setting. Press the tops lightly to compact them so they hold together once cooled. This shaping step is important because it helps the treats set properly and look neat.
⏱ Time: 4
✓ Doneness: Mounds are shaped and compact, holding their form on the parchment.
Step 4
Decorate each mound with sprinkles, edible glitter, or candy eyes while the chocolate is still wet so they stick well. This adds a fun, festive touch and makes them visually appealing for Easter. Don’t be shy to get creative here — it’s part of the fun!
⏱ Time: 2
✓ Doneness: Decorations are evenly placed and adhering to the treats.
Step 5
Place the baking sheet in the refrigerator for about 10 minutes to let the treats set firmly. Chilling helps the chocolate harden quickly, so the treats hold their shape when you serve them. Avoid skipping this step or the treats might be too soft and sticky to handle.
⏱ Time: 10
✓ Doneness: Treats are firm to the touch and hold their shape when lifted.
Step 6
Once set, carefully remove the treats from the parchment paper and arrange them on a serving platter. If you want, you can store them in an airtight container in the fridge until you’re ready to serve. They stay fresh for a few days and keep their texture nicely.
⏱ Time: 2
✓ Doneness: Treats are firm and ready to serve or store.
Step 7
To serve, bring the treats out of the fridge about 10 minutes beforehand so they soften slightly for the best texture. This little rest time lets the flavors come through and makes them easier to bite into without being too hard.
⏱ Time: 10
✓ Doneness: Treats are slightly softened but still hold shape.
Step 8
Feel free to experiment by adding chopped nuts or shredded coconut into the mix for extra texture and flavor. Just fold them in during step 2 before shaping. These add-ins can elevate the treats and make them even more special.
⏱ Time: 1
✓ Doneness: Add-ins are evenly distributed throughout the mixture.
Step 9
If you want to make these vegan or dairy-free, swap the white chocolate for a vegan version and use vegan marshmallows. The process remains the same, and you’ll still get that sweet, festive treat everyone will love.
⏱ Time: 1
✓ Doneness: Vegan ingredients are fully incorporated and treats set properly.
Pro Tips
Melt white chocolate slowly in short bursts.
White chocolate burns easily if heated too quickly, resulting in a grainy texture. Melting in 20-30 second intervals with stirring helps maintain a smooth consistency essential for binding the treats evenly.
Use fresh mini marshmallows for best texture.
Older marshmallows dry out and crumble, losing their chewiness. Fresh marshmallows stay soft and pliable, providing a pleasant contrast to the crunchy candies and crackers.
Chill treats fully before serving.
Cooling solidifies the white chocolate, helping the treats hold their shape. Serving too soon makes them sticky and hard to handle, while chilling ensures a clean bite and neat presentation.
Add decorations while chocolate is still wet.
Applying sprinkles or candy eyes immediately after shaping ensures they stick firmly. Waiting until the chocolate sets will cause decorations to fall off or not adhere properly.
Customize with nuts or coconut for texture.
Adding chopped nuts or shredded coconut introduces new textures and flavors, making the treats more interesting. Fold them in gently to avoid breaking candies or marshmallows.
Use parchment paper for easy removal.
Parchment prevents sticking and makes it easy to lift treats off the tray without damage. It also simplifies cleanup, especially when working with sticky melted chocolate.
Let treats rest at room temperature before eating.
Allowing treats to warm slightly softens the chocolate, making bites smoother and more enjoyable without losing shape.
Common Mistakes to Avoid
Overheating white chocolate
Why it happens People often rush melting and end up burning the chocolate, causing it to seize and become grainy.
Fix Melt chocolate in short bursts, stirring frequently. If it seizes, add a teaspoon of vegetable oil and stir gently to smooth it out.
Mixing ingredients while chocolate is too hot
Why it happens Hot chocolate can melt candy shells or marshmallows, ruining texture and appearance.
Fix Let melted chocolate cool slightly but remain fluid before folding in other ingredients to keep candies intact.
Skipping chilling step
Why it happens Impatience to serve leads to sticky, unformed treats that fall apart.
Fix Always refrigerate treats for at least 10 minutes to let chocolate set firmly before handling.
Using old or stale marshmallows
Why it happens Stale marshmallows lack softness and can crumble, affecting texture.
Fix Use fresh mini marshmallows and store extras in airtight containers to maintain freshness.
Applying decorations too late
Why it happens Waiting until chocolate hardens causes decorations to not stick and fall off.
Fix Add decorations immediately after shaping treats while chocolate is still wet and sticky.
Variations
Nutty Easter Treats
Add 1/2 cup chopped toasted almonds or pecans to the mix for a crunchy, nutty twist. The nuts add a rich flavor that pairs wonderfully with the sweetness of the chocolate and candies.
Note: Fold nuts in gently during mixing to avoid breaking other ingredients; no change in chilling time needed.
Coconut Easter Bites
Mix in 1/2 cup shredded unsweetened coconut for a tropical flair. The coconut adds texture and a subtle sweetness that complements the vanilla and chocolate.
Note: Incorporate coconut during step 2; treats may be slightly more crumbly but still hold well when chilled.
Vegan Easter Treats
Use vegan white chocolate and vegan marshmallows to make this recipe plant-based. The flavor remains sweet and festive, perfect for dairy-free diets.
Note: Ensure vegan chocolate melts smoothly; chilling time remains the same for proper setting.
Peanut Butter Chocolate Easter Treats
Add 1/4 cup creamy peanut butter to the melted white chocolate for a rich, nutty flavor. This variation adds creaminess and a salty contrast to the sweetness.
Note: Mix peanut butter into melted chocolate before combining with other ingredients for even distribution.
Gluten-Free Easter Treats
Use gluten-free graham crackers or substitute with crushed gluten-free cookies. This keeps the recipe safe for gluten-sensitive eaters without sacrificing texture.
Note: Check all ingredients for gluten-free certification; preparation and chilling remain unchanged.
Nutrition
Per Serving:
Nutritional values are estimates and may vary based on specific ingredients used.
Storage & Tips
Room Temperature
These treats can safely sit at room temperature for up to 2 hours if covered to avoid drying out. Beyond that, they may soften too much and lose shape.
Refrigerator
Store in an airtight container in the fridge for up to 5 days. The treats stay firm and fresh, but bringing them to room temperature before serving improves texture and flavor.
Freezer
Freeze in airtight containers for up to 2 months. Wrap treats individually in parchment before freezing to prevent sticking. Thaw in the fridge overnight, then bring to room temperature before eating.
Reheating
No reheating needed. If desired, let treats sit at room temperature 10-15 minutes before serving for best texture. Avoid microwaving, which can melt the chocolate and ruin shape.
Make Ahead
Prepare the mixture and shape treats 1-2 days ahead, store chilled in airtight containers. Add decorations just before serving to keep them fresh and vibrant.
FAQ
Can I use dark or milk chocolate instead of white chocolate?
Yes, you can substitute with dark or milk chocolate, but the flavor and color will change. Dark chocolate will give a richer, less sweet taste, while milk chocolate will be creamier. Melt and use the same way, but be sure to melt gently to avoid burning.
What if I don’t have graham crackers?
You can substitute crushed digestive biscuits, vanilla wafers, or any mild cookie crumbs. These will add similar texture and a touch of sweetness. Just make sure to crush them finely for even mixing.
How do I keep the candy coatings from melting?
Make sure the melted chocolate isn’t too hot when you fold in the candies. Let it cool slightly but remain liquid. Also, mix gently to avoid breaking the candy shells, which helps maintain their color and crunch.
Can I make these treats gluten-free?
Absolutely! Use gluten-free graham crackers or cookies and ensure all other ingredients are gluten-free. The texture and flavor remain very similar, and it’s a safe option for gluten-sensitive diets.
How long do these treats keep fresh?
Stored properly in the fridge, they keep fresh for up to 5 days. Keep them in an airtight container to prevent drying out or absorbing fridge odors. Bring to room temperature before serving for best taste.
Can I freeze these treats?
Yes, freezing is a great option. Wrap treats individually in parchment paper and store in an airtight container. Thaw in the fridge overnight and bring to room temperature before eating to restore texture.
What’s the best way to melt white chocolate without burning it?
Use a microwave in 20-30 second bursts, stirring after each interval. Alternatively, melt over a double boiler on low heat. Avoid direct high heat to prevent scorching and graininess.
Can I add nuts or other mix-ins?
Definitely! Fold in chopped nuts, coconut flakes, or dried fruit during mixing. Just be gentle to keep candies and marshmallows intact. These add-ins bring extra texture and flavor.
Final Thoughts
I hope you enjoy making these fun, quick Easter treats as much as I do! Don’t forget to share your colorful creations and spread some holiday cheer.