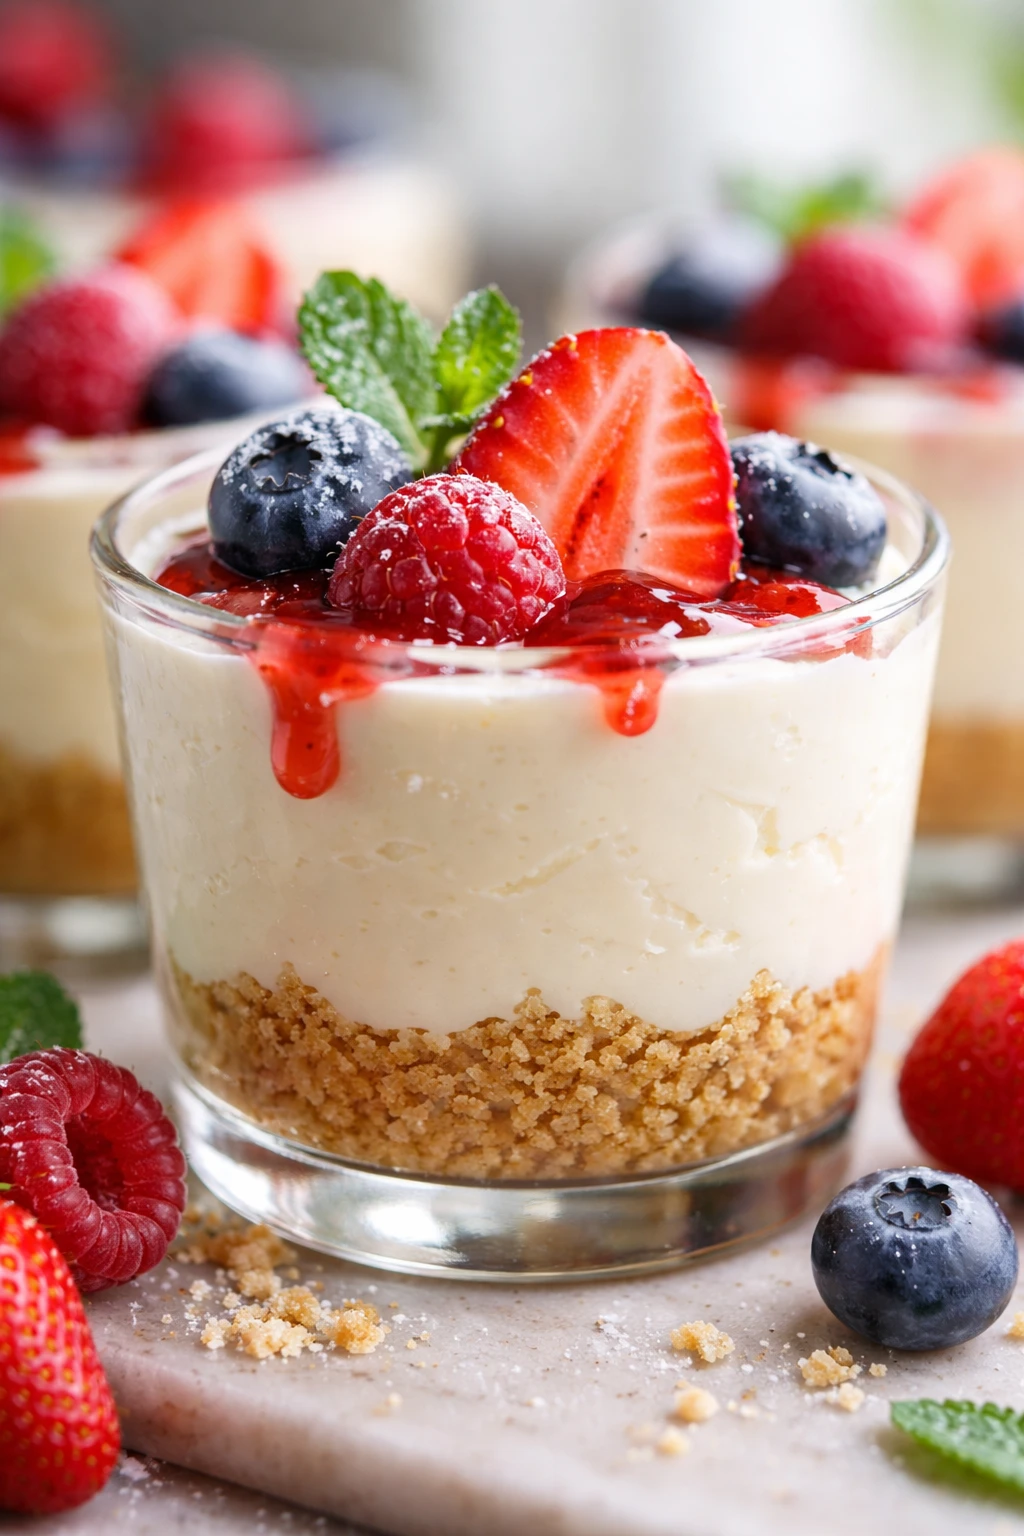
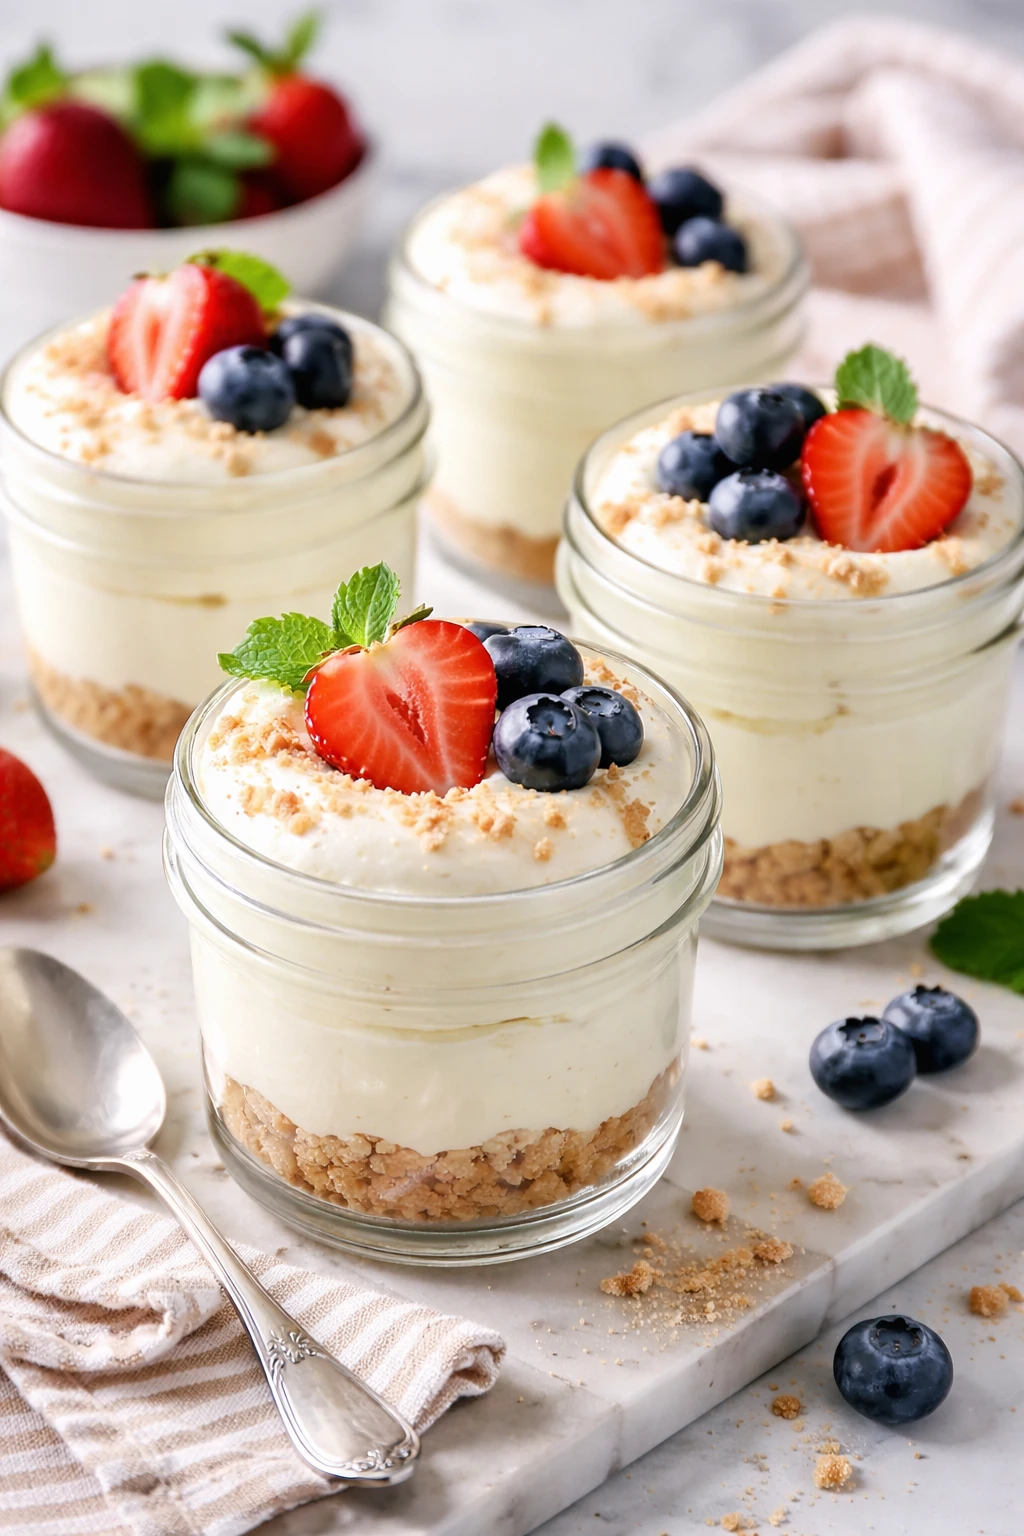
These no-bake cheesecake cups are a dream—super creamy and light thanks to folding whipped cream into cream cheese. Perfect for a quick dessert fix or when you want something sweet without heating up the kitchen!
Introduction
I first stumbled upon this no-bake cheesecake cups recipe during a summer gathering when I didn’t want to turn on the oven but still craved something indulgent. What makes these cups stand out from traditional cheesecakes is the technique of folding whipped cream into cream cheese, which gives them an incredibly light and creamy texture without the heaviness. I’ve tried other no-bake versions that felt dense or too sweet, but this one strikes the perfect balance — it’s smooth, airy, and just sweet enough.
One trick I learned is to make sure the cream cheese is completely softened before mixing, so it blends effortlessly with the sugar and vanilla. Then, folding in the whipped cream gently keeps the mixture fluffy without deflating it. The graham cracker crust is simple but adds that classic crunch that contrasts beautifully with the creamy filling. These cups are perfect for last-minute dessert needs, and they always impress guests without much fuss. Plus, decorating with fresh berries or a drizzle of chocolate makes them feel extra special. I love how quick and adaptable this recipe is — it’s become my go-to sweet treat anytime I want something rich but not overwhelming.
What You'll Need
4 individual cheesecake cups
- 8 ounces cream cheese, softened
- 1/2 cup granulated sugar
- 1 teaspoon vanilla extract
- 1 cup heavy whipping cream, chilled
- 1 cup graham cracker crumbs
- 3 tablespoons unsalted butter, melted
- Fresh berries or fruit, for garnish (optional)
How To Do It
Step 1
Start by preparing the graham cracker crust. In a mixing bowl, combine the graham cracker crumbs with the melted butter until the mixture resembles wet sand. This step is crucial because the butter acts as a binder for the crumbs, helping the crust hold together once chilled. Avoid adding too much butter, or it will become soggy. Press this mixture firmly into the bottom of your serving cups or jars to create an even layer. Pressing firmly ensures a compact crust that won’t crumble when you eat the cheesecake.
⏱ Time: 5 minutes
✓ Doneness: Crust feels firm and packed down evenly in the bottom of each cup.
Step 2
Using a handheld mixer or stand mixer, beat the softened cream cheese along with the sugar and vanilla extract until completely smooth and creamy. This step is key to eliminating any lumps and ensuring a silky texture. If the cream cheese isn’t softened enough, you’ll end up with clumps that won’t blend well. Take your time beating on medium speed until the mixture is pale and fluffy.
⏱ Time: 3-5 minutes
✓ Doneness: Mixture is smooth, light in color, and free of lumps.
Step 3
In a separate chilled bowl, whip the heavy cream to stiff peaks. This means when you lift the whisk, the peaks hold their shape firmly without collapsing. Whipping the cream properly is vital because it adds the airy lightness to the cheesecake filling. Don’t under-whip or the filling will be too dense; over-whipping can turn the cream grainy and buttery, ruining the texture.
⏱ Time: 5 minutes
✓ Doneness: Cream holds stiff peaks and looks glossy.
Step 4
Gently fold about one-third of the whipped cream into the cream cheese mixture to lighten it. Folding means carefully mixing with a spatula using a gentle motion, turning the bowl and lifting the mixture from the bottom to the top. This technique preserves the air whipped into the cream. Rushing or stirring too vigorously will deflate the mixture, resulting in a denser texture.
⏱ Time: 2 minutes
✓ Doneness: Mixture is lighter and more airy but still smooth.
Step 5
Add the remaining whipped cream in two additions, folding gently after each addition until fully incorporated. This gradual folding helps maintain the fluffy texture throughout the filling. Once fully combined, the filling should be thick, light, and creamy with no streaks of whipped cream visible.
⏱ Time: 3 minutes
✓ Doneness: Filling is uniform in texture and airy.
Step 6
Spoon or pipe the cheesecake filling over the prepared graham cracker crust in each cup. Fill them generously but leave a little space at the top for garnish if desired. Using a piping bag or zip-top bag with a corner cut off helps create a neat presentation and even layers.
⏱ Time: 5 minutes
✓ Doneness: Each cup is filled evenly with a smooth top layer.
Step 7
Cover the cups tightly with plastic wrap or lids and refrigerate for at least 4 hours, preferably overnight. Chilling is essential because it allows the filling to set and the flavors to meld. If you skip chilling or shorten the time, the filling won’t firm up properly and may be too soft or runny when served.
⏱ Time: 240 minutes
✓ Doneness: Filling is firm to the touch and holds shape when served.
Step 8
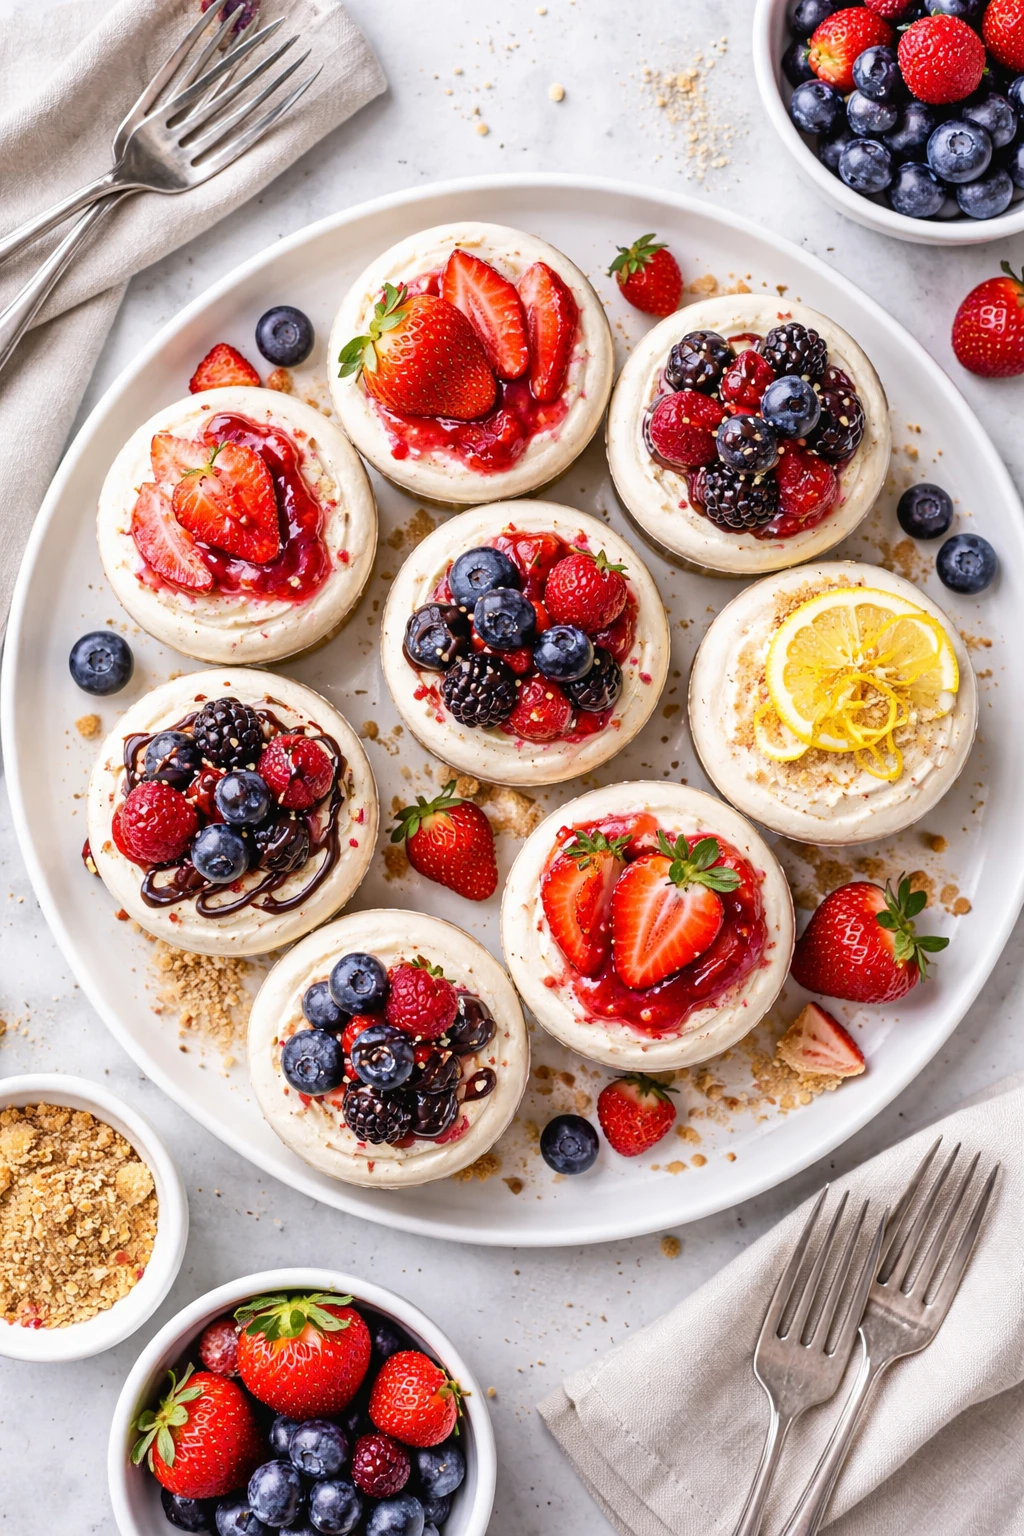
Before serving, garnish the cheesecake cups with fresh berries, chocolate shavings, or a drizzle of fruit sauce. This adds color, texture, and a fresh brightness to the rich dessert. You can also sprinkle a little extra graham cracker crumbs on top for crunch. Presentation makes the dessert feel special and inviting.
⏱ Time: 5 minutes
✓ Doneness: Garnishes look fresh and vibrant on creamy surface.
Step 9
Serve chilled straight from the fridge. These cheesecake cups taste best cold and creamy. If you leave them out too long at room temperature, the filling can soften too much and lose its structure. Enjoy with a small spoon, savoring the contrast between the crunchy crust and airy filling.
⏱ Time: Immediate
✓ Doneness: Filling remains firm and cool during serving.
Pro Tips
Make sure your cream cheese is completely softened before mixing.
Softened cream cheese blends smoothly with sugar and vanilla, preventing lumps and ensuring a silky filling. Cold cream cheese is tough and results in uneven texture, while over-softened or melted cream cheese can make the filling too runny.
Chill your mixing bowl and beaters before whipping the cream.
A cold bowl helps the cream whip faster and achieve stiffer peaks. Warm bowls slow down whipping and can cause the cream to become watery instead of fluffy, which affects the light texture of the filling.
Fold whipped cream gently into the cream cheese mixture using a spatula.
Folding preserves the air bubbles whipped into the cream, keeping the filling light and airy. Stirring or beating too aggressively deflates the mixture, resulting in a denser texture.
Press the graham cracker crust firmly into the cups.
Firmly pressing the crust helps it hold together and prevents crumbling when eating. A loose crust can fall apart and won’t provide the satisfying crunch contrast to the creamy filling.
Refrigerate the cheesecake cups for at least 4 hours before serving.
Chilling allows the filling to firm up and the flavors to meld. Without sufficient chilling, the dessert will be too soft and won’t hold its shape when served.
Use a piping bag to fill the cups for a neat presentation.
Piping the filling helps create even, smooth layers and looks professional. Scooping with a spoon can be messier and uneven.
Add fresh berries or chocolate shavings just before serving.
Garnishes add texture, color, and flavor contrast, making the dessert more visually appealing and delicious. Adding them too early can cause sogginess or wilting.
Common Mistakes to Avoid
Using cold cream cheese straight from the fridge.
Why it happens Many assume mixing cold cream cheese is fine, but it’s harder to blend and often causes lumps.
Fix Always let cream cheese sit at room temperature for at least 30 minutes before mixing. If short on time, soften it in short bursts in the microwave but don’t melt it.
Over-whipping the cream until it becomes grainy.
Why it happens It’s easy to keep whipping past stiff peaks, thinking it needs to be firmer.
Fix Stop whipping as soon as stiff peaks form—when peaks stand straight without drooping. If over-whipped, start with fresh cream as broken cream won’t re-emulsify.
Mixing whipped cream too aggressively into the cream cheese.
Why it happens Some try to speed up mixing by stirring fast or using a hand mixer.
Fix Fold gently with a spatula using slow, careful motions to keep the air bubbles intact for a light texture.
Not pressing the crust firmly enough.
Why it happens Rushing or loosely packing the crust leads to crumbly cups.
Fix Use the bottom of a glass or spoon to press the crust firmly and evenly to create a solid base.
Skipping the chilling time.
Why it happens Impatience or last-minute serving plans cause skipping refrigeration.
Fix Plan ahead and refrigerate at least 4 hours or overnight to allow filling to set properly.
Variations
Berry Swirl Cheesecake Cups
Add a swirl of your favorite berry jam or puree into the cream cheese mixture before folding in the whipped cream. This adds a fruity tang and beautiful marbled effect. Use fresh or frozen berries cooked down with sugar for the puree.
Note: Swirl gently to avoid fully mixing the jam, preserving the marbled look and distinct berry flavor.
Chocolate No-Bake Cheesecake Cups
Mix in 1/4 cup melted dark chocolate into the cream cheese mixture before folding in whipped cream. This creates a rich chocolate version that pairs perfectly with a chocolate cookie crust instead of graham crackers.
Note: Allow melted chocolate to cool slightly before mixing to avoid curdling the cream cheese.
Lemon Zest Cheesecake Cups
Add 1 tablespoon fresh lemon zest and 1 tablespoon lemon juice to the cream cheese mixture for a bright, citrusy twist. This lightens the flavor and adds freshness, perfect for spring or summer.
Note: Be careful not to add too much lemon juice as excess liquid can thin the filling.
Peanut Butter Swirl Cheesecake Cups
Fold 1/4 cup creamy peanut butter into the cream cheese before adding whipped cream for a nutty, rich flavor. Garnish with chopped peanuts or chocolate chips for extra texture.
Note: Warm peanut butter slightly to soften it for easier mixing without lumps.
Vegan No-Bake Cheesecake Cups
Use vegan cream cheese and coconut cream whipped to stiff peaks instead of heavy cream to make this dessert dairy-free. The texture will be slightly different but still creamy and delicious.
Note: Chill coconut cream overnight and scoop only the solid part for whipping.
Nutrition
Per Serving:
Nutritional values are estimates and may vary based on specific ingredients used.
Storage & Tips
Room Temperature
These cheesecake cups should not be left at room temperature for more than 2 hours as the filling contains dairy that can spoil. Keep covered to prevent drying out or contamination if left briefly.
Refrigerator
Store in an airtight container or cover cups tightly with plastic wrap and refrigerate for up to 3 days. The texture may firm slightly but remains delicious chilled. Avoid leaving uncovered to prevent crust from softening.
Freezer
Freeze cheesecake cups for up to 1 month by wrapping each cup tightly in plastic wrap and placing in a freezer-safe container. Thaw overnight in the fridge before serving. Texture may be slightly less creamy after freezing but still tasty.
Reheating
No reheating needed; serve chilled. If desired, let cups sit at room temperature for 10 minutes before eating for a softer texture. Avoid microwaving as it will melt the filling.
Make Ahead
Prepare the crust and filling up to 2 days in advance. Assemble the cups and refrigerate covered until ready to serve. Add fresh garnishes just before serving for best appearance and flavor.
FAQ
Can I use low-fat cream cheese for this recipe?
Using low-fat cream cheese is not recommended because it contains more water and less fat, which can make the filling runny and less creamy. Full-fat cream cheese provides the richness and texture essential for this no-bake cheesecake. If you must use low-fat, expect a less stable filling and consider adding a stabilizer like gelatin.
How do I soften cream cheese quickly if I forgot to take it out of the fridge?
You can soften cream cheese quickly by cutting it into small cubes and microwaving in short 10-second bursts, stirring after each until soft but not melted. Alternatively, leave it in a sealed bag in warm water for 10-15 minutes. This prevents lumps and ensures smooth mixing.
Can I make these cheesecake cups vegan?
Yes! Substitute cream cheese with vegan cream cheese alternatives and use chilled coconut cream whipped to stiff peaks instead of heavy cream. The texture will differ slightly but still be creamy and delicious. Make sure to chill the coconut cream overnight to get the best whipping results.
What if my whipped cream doesn’t form stiff peaks?
If your cream won’t whip to stiff peaks, it might be too warm or low in fat. Use heavy cream with at least 36% fat and chill your bowl and beaters. If cream still doesn’t whip, try a different brand or check expiration dates, as older cream can lose whipping ability.
How long do these cheesecake cups keep in the fridge?
They keep well for up to 3 days when stored in an airtight container or covered tightly. After that, the crust may soften and the filling texture might change. For best taste and texture, consume within 2-3 days.
Can I use a different crust besides graham crackers?
Absolutely! Crushed digestive biscuits, vanilla wafers, or even Oreo crumbs work great. Just make sure to mix them with melted butter to bind. Each crust will add its own flavor, so choose one that complements your filling.
Is it possible to make these into one large cheesecake instead of cups?
Yes, you can assemble the filling and crust in a springform pan instead of cups. The chilling time remains the same. Just be sure to line the pan with parchment for easy removal and possibly extend chilling to ensure it sets firmly.
Why does my filling sometimes turn out grainy?
Graininess usually happens if the cream cheese wasn’t softened enough or if the cream was over-whipped and started breaking down. Make sure cream cheese is smooth before mixing, and whip cream only until stiff peaks form. Also, avoid overheating ingredients.
Final Thoughts
I hope you have as much fun making and eating these no-bake cheesecake cups as I do! Don’t forget to share your creations and let me know how they turn out.