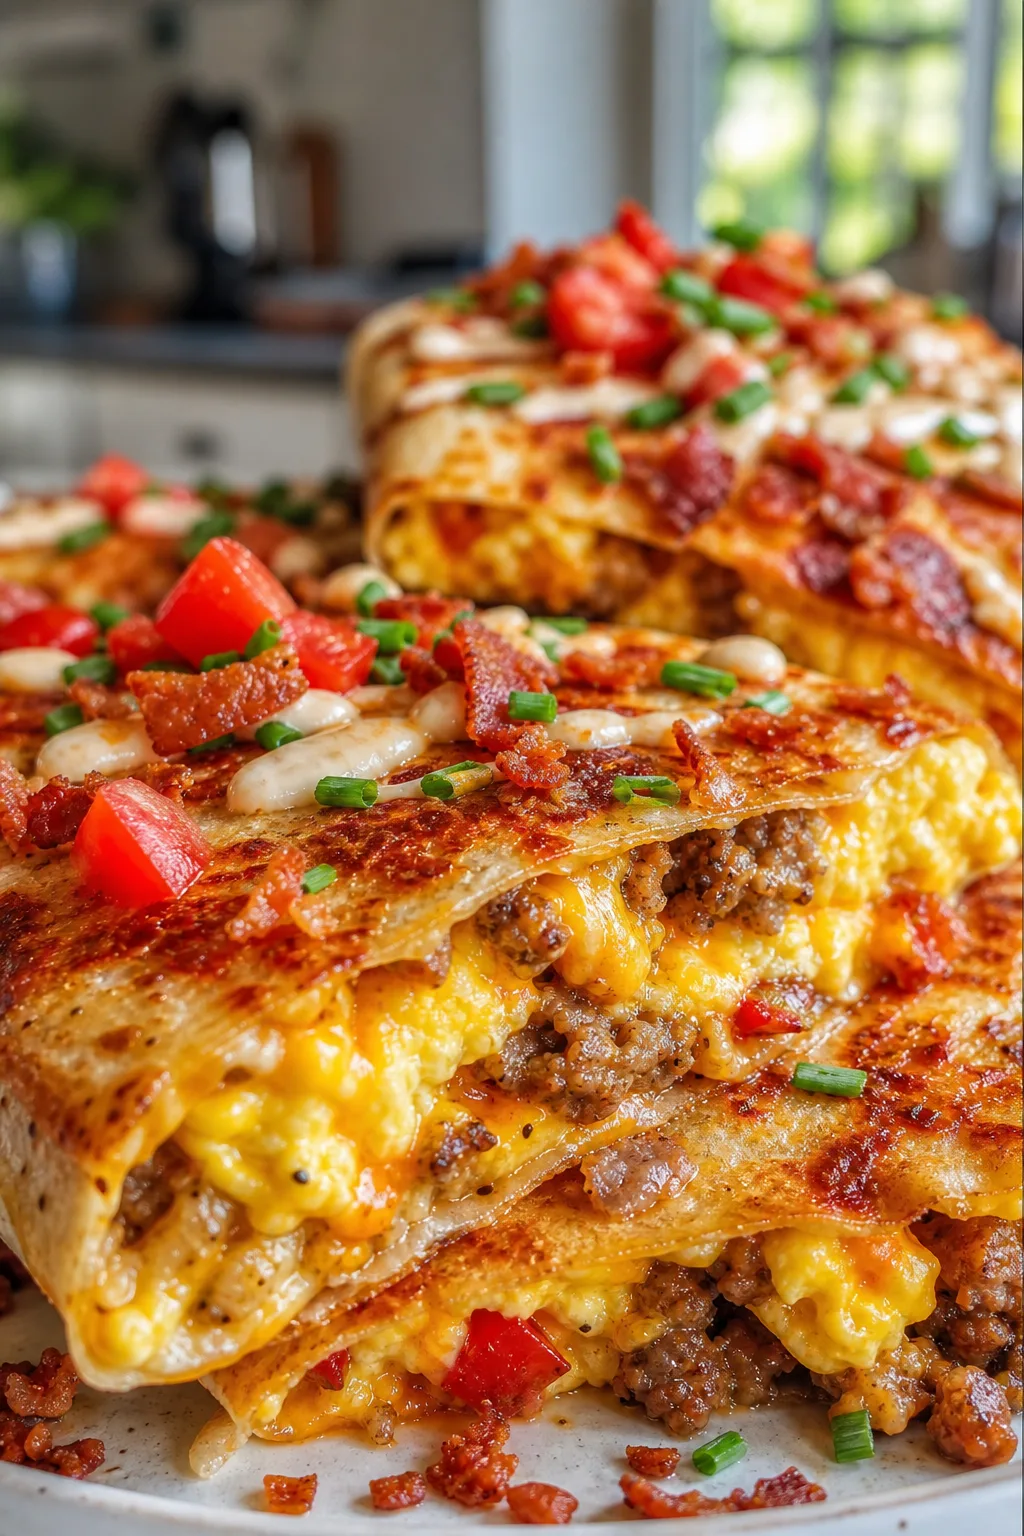
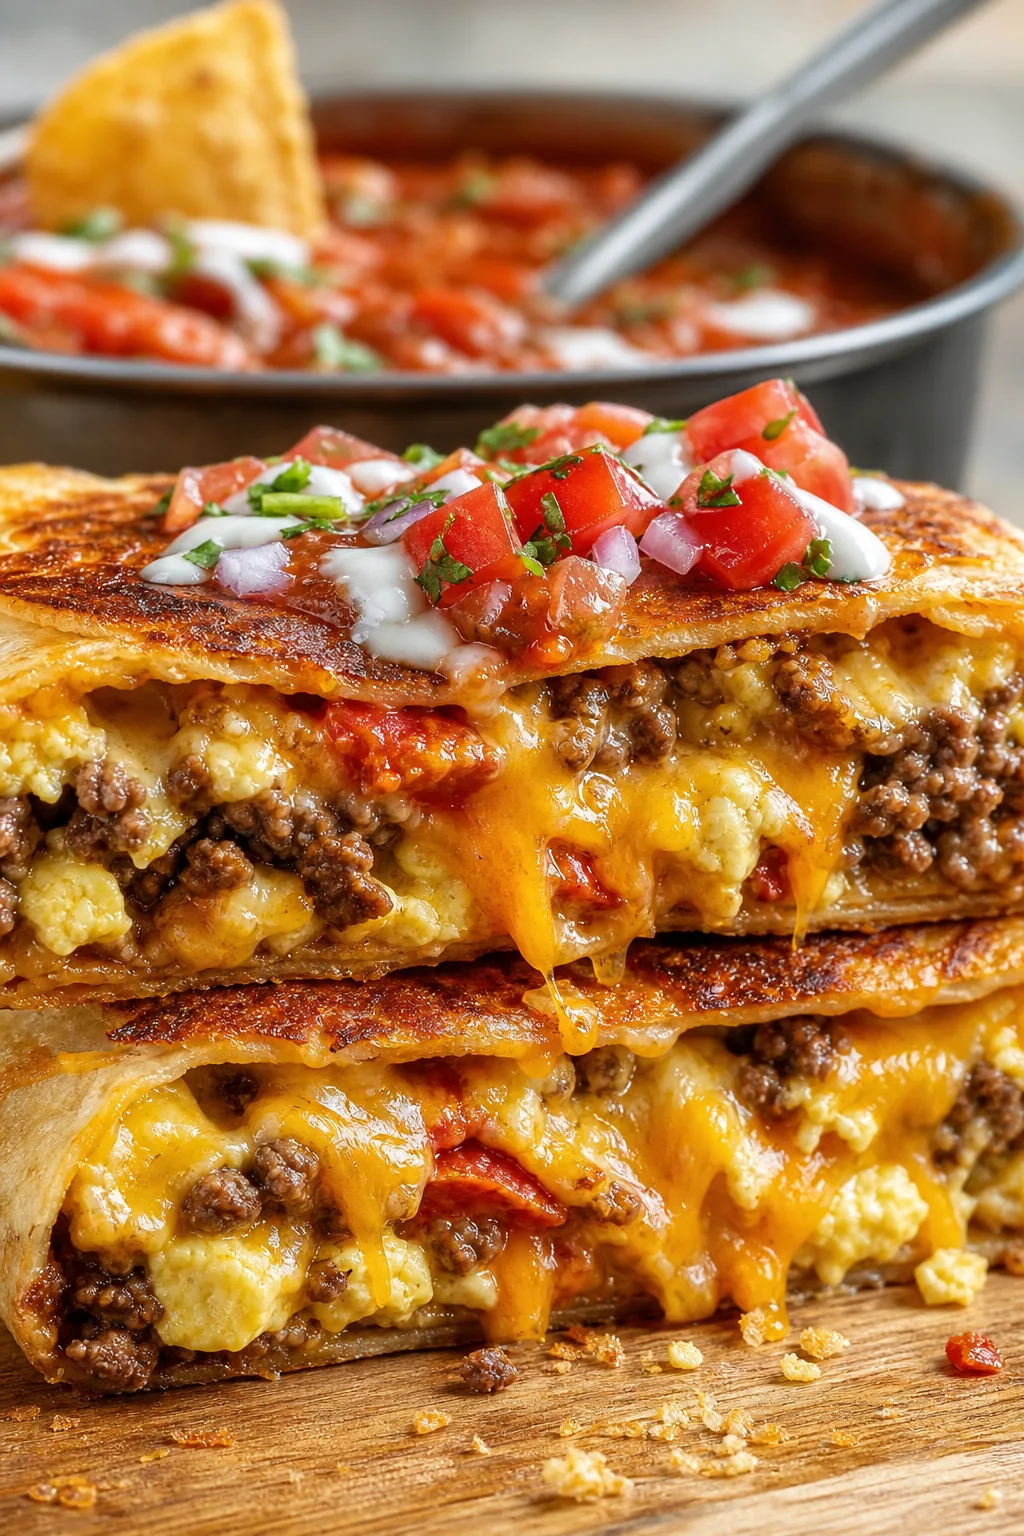
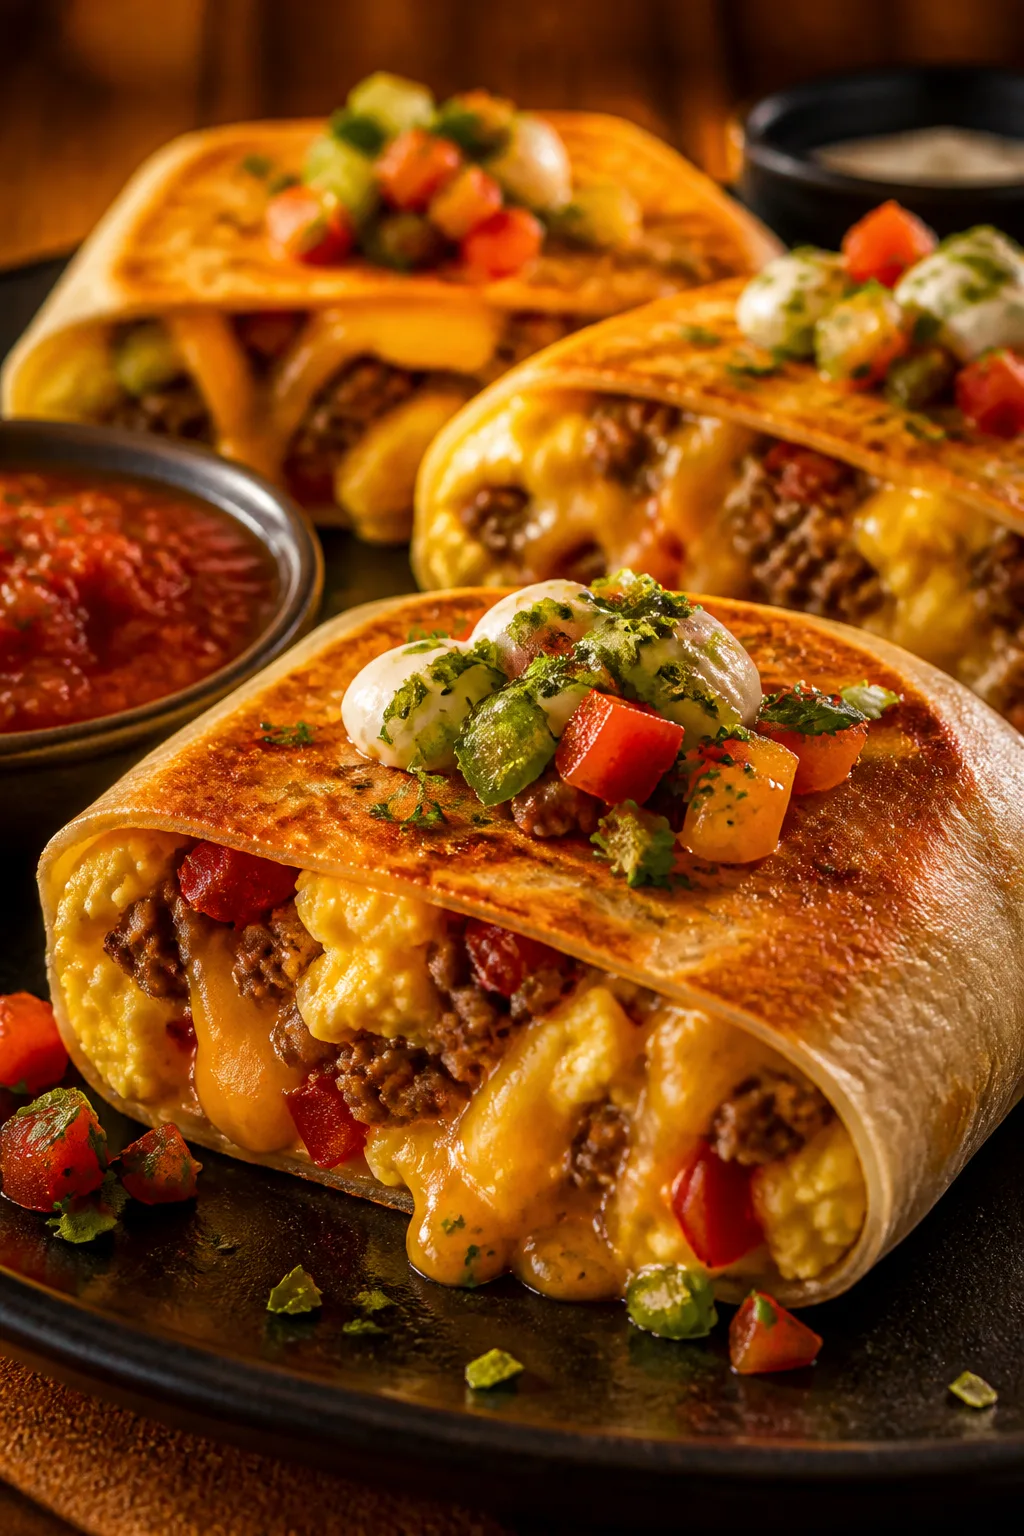
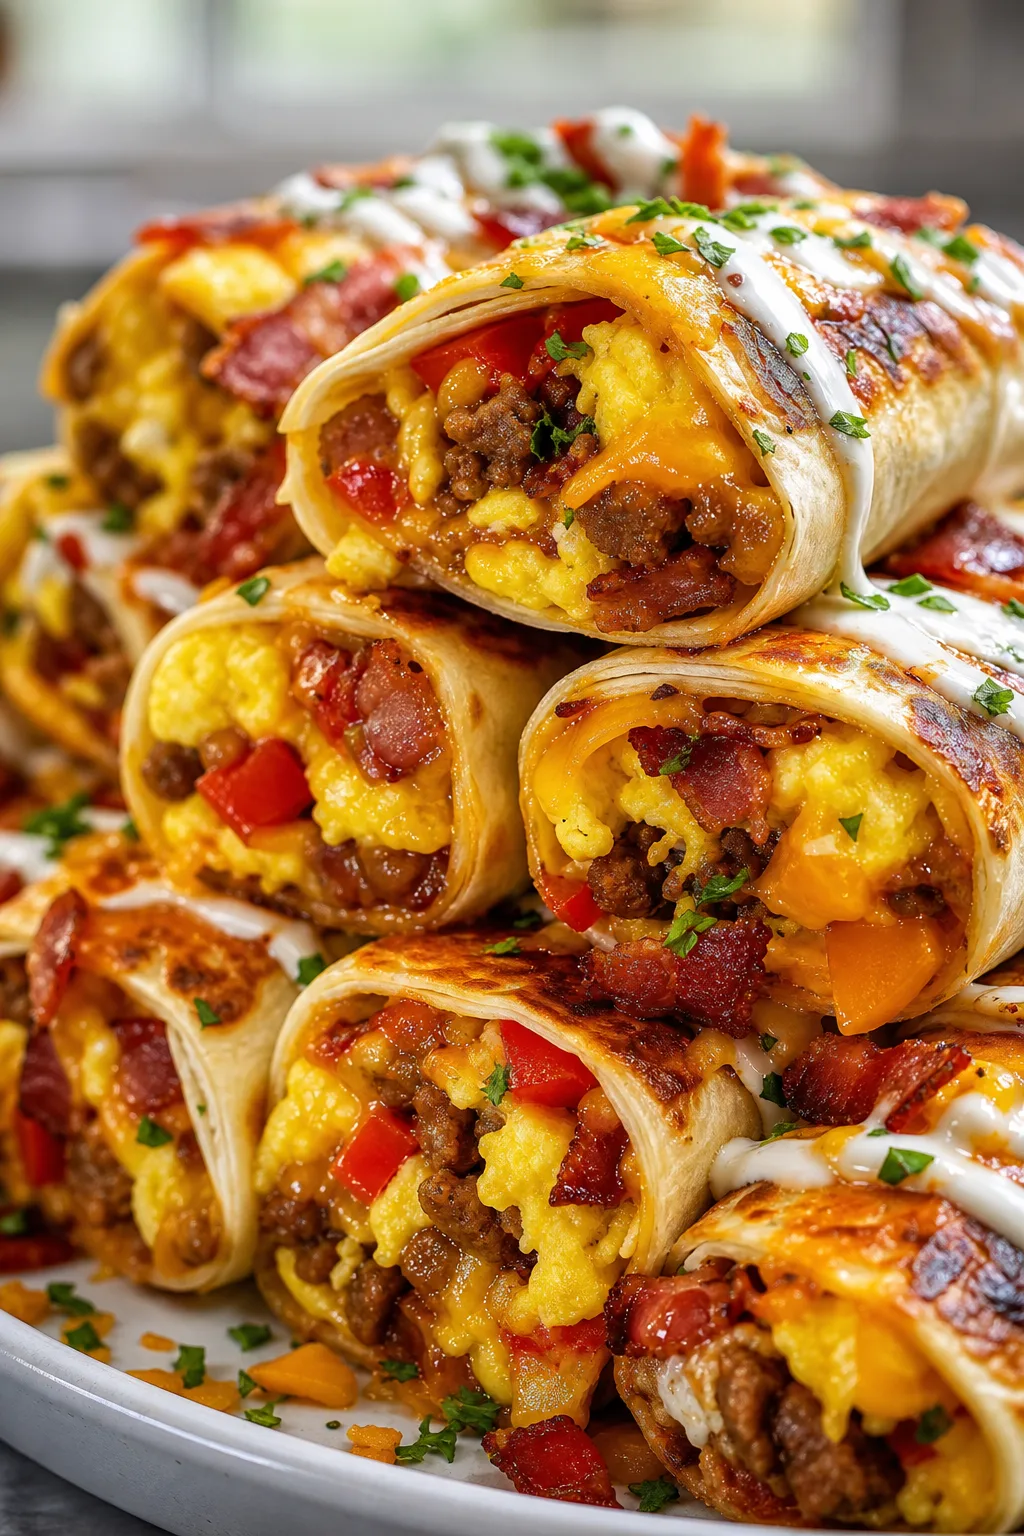
This sheet pan breakfast crunchwrap is my go-to for busy mornings. Loaded with fluffy eggs, savory sausage, and gooey cheese, all toasted to golden perfection. Great for brunch with friends or a quick family meal!
Introduction
I've been making this sheet pan breakfast crunchwrap for years now, and honestly, it's a total lifesaver on busy mornings or when guests pop over unexpectedly. The first time I attempted a breakfast crunchwrap, I tried folding each one individually in a skillet, and it was a hot mess—messy, time-consuming, and unevenly cooked. Then I discovered the sheet pan method, and it changed everything. You get perfectly toasted edges, crispy bottoms, and melty cheese all at once. Plus, it's easy to customize—I've added everything from peppers to onions to spice it up a bit. The trick I learned is to pre-cook the sausage and eggs separately before assembling because it keeps the tortillas crisp and prevents sogginess. When it's done, the crunchwrap has this golden, slightly crisp exterior with a gooey, savory filling inside that feels like a warm, comforting hug. It’s perfect for weekend brunches or even a quick weekday breakfast if you’re in a rush. I love making a big batch and letting everyone grab their own. It’s simple, satisfying, and always a crowd-pleaser.
How To Do It
Step 1
Preheat your oven to 375°F (190°C). While the oven warms up, cook the breakfast sausage in a skillet over medium heat until browned and cooked through, about 6-8 minutes. Drain any excess grease to keep the crunchwrap from getting soggy later. Cooking the sausage fully beforehand ensures it's safe to eat and adds a nice savory punch to the filling.
⏱ Time: 8
✓ Doneness: Sausage is browned evenly with no pink spots and slightly crisp edges
Step 2
In a separate pan, melt the butter over medium heat. Add the diced onions and bell peppers, cooking until softened and fragrant, about 5 minutes. Then pour in the beaten eggs, season with salt and pepper, and scramble gently until just set but still moist. Avoid overcooking the eggs here to keep them creamy inside the crunchwrap.
⏱ Time: 7
✓ Doneness: Eggs are fluffy, slightly glossy, and vegetables are tender without browning
Step 3
Lay out four tortillas on a large baking sheet. Evenly divide the cooked eggs, sausage, and sautéed veggies among them, placing the filling in the center of each tortilla. Sprinkle shredded cheddar cheese over the filling. The layering is key here to create that gooey, cheesy center that holds everything together once baked.
⏱ Time: 5
✓ Doneness: Fillings are centered and cheese is evenly distributed on top
Step 4
Top each filled tortilla with another tortilla, pressing lightly to adhere. Carefully fold the edges of the top tortilla underneath the bottom one, creating a sealed pocket. This folding technique traps the filling and crisps up beautifully in the oven, giving you that signature crunchwrap texture.
⏱ Time: 5
✓ Doneness: Edges are neatly folded under with no gaps or tears
Step 5
Brush the tops of each crunchwrap lightly with melted butter or a little oil. This step is crucial for achieving a golden, crispy exterior as it promotes browning through the Maillard reaction during baking.
⏱ Time: 3
✓ Doneness: Surface is evenly coated with a thin, glistening layer of butter
Step 6
Place the baking sheet in the preheated oven and bake for 15-18 minutes. Halfway through, carefully flip each crunchwrap to ensure both sides crisp evenly. This flipping helps avoid sogginess and promotes balanced browning on all surfaces.
⏱ Time: 18
✓ Doneness: Crunchwraps are golden brown and crispy on both sides
Step 7
Remove the crunchwraps from the oven and let them rest for 2-3 minutes before slicing. Resting allows the cheese to set slightly, making the crunchwrap easier to cut and eat without the filling spilling out.
⏱ Time: 3
✓ Doneness: Crunchwraps feel firm to the touch but still warm inside
Step 8
Slice each crunchwrap in half diagonally for a nice presentation and easier handling. Serve warm with your favorite salsa and a dollop of sour cream on the side for extra flavor and creaminess.
⏱ Time: 2
✓ Doneness: Slices hold shape with melty cheese visible inside
Step 9
Enjoy immediately while warm and crispy! If you have leftovers, store them properly for the best texture later. This recipe is great for making ahead and reheating without losing that crunch.
⏱ Time: 1
✓ Doneness: Crunchwraps remain flavorful and crispy after reheating
Pro Tips
Don’t skip the flipping halfway through baking.
Flipping ensures both sides of the crunchwrap get evenly crispy and prevents one side from burning while the other stays undercooked. This step balances heat exposure and improves overall texture.
Use room temperature eggs for scrambling.
Room temperature eggs cook more evenly and fluff up better, resulting in tender scrambled eggs that stay moist inside the crunchwrap.
Pat dry cooked sausage before adding to filling.
Removing excess grease prevents soggy tortillas and helps maintain that signature crunch. It also keeps the flavor from becoming greasy or overwhelming.
Brush tortillas lightly but thoroughly with butter.
Even coating promotes uniform browning and crisping, thanks to the Maillard reaction, giving the crunchwrap a beautiful golden color and great texture.
Let crunchwraps rest before slicing.
Resting lets the cheese set, so the filling holds together better. If sliced too soon, the filling might spill out and ruin the presentation.
Use a sharp knife to slice the crunchwraps.
A sharp knife cuts cleanly through the crispy exterior and gooey interior without squashing or tearing the crunchwrap, preserving its layers.
Customize fillings with sautéed veggies for extra flavor.
Adding veggies like peppers and onions introduces moisture and sweetness, enhancing taste while the pre-cooking step prevents sogginess.
Common Mistakes to Avoid
Skipping the pre-cooking of sausage and veggies
Why it happens Many assume that assembling raw ingredients saves time, but this leads to soggy tortillas and uneven cooking.
Fix Always fully cook and drain sausage and sauté vegetables before assembly. This ensures fillings are dry enough to crisp the tortilla and flavor is fully developed.
Not folding tortillas tightly
Why it happens Rushing or being careless during folding causes gaps where filling leaks out.
Fix Take your time folding edges snugly under the bottom tortilla to trap filling. This keeps the crunchwrap intact and prevents mess during baking.
Overcooking eggs during scrambling
Why it happens Overcooked eggs become rubbery inside the crunchwrap.
Fix Scramble eggs gently and remove from heat when still slightly moist; they’ll finish cooking inside the crunchwrap for creamy texture.
Not brushing tortillas with butter or oil
Why it happens Skipping this step results in pale, soft crunchwraps instead of golden, crispy ones.
Fix Brush a thin, even layer of melted butter or oil on tortillas before baking to promote browning and crispness.
Slicing crunchwraps immediately after baking
Why it happens Cutting too soon causes cheese and filling to spill out.
Fix Let crunchwraps rest for a few minutes to allow fillings to set, making slicing cleaner and easier.
Variations
Vegetarian Crunchwrap
Swap out the sausage for sautéed mushrooms, spinach, and black beans for a hearty vegetarian option. Add a pinch of smoked paprika for depth. Expect a slightly earthier flavor and a moist, satisfying texture.
Note: Ensure all veggies are cooked and moisture is reduced to prevent soggy tortillas.
Spicy Breakfast Crunchwrap
Add diced jalapeños or a dash of hot sauce to the eggs and sausage mixture. Top with pepper jack cheese for a spicy kick. This version is great if you love heat and bold flavors in your breakfast.
Note: Adjust spice levels to taste and watch for moisture from fresh peppers.
Southwest Style Crunchwrap
Incorporate corn kernels, black beans, diced tomatoes, and cilantro into the filling. Serve with a side of guacamole for a fresh twist. The crunchwrap feels vibrant and colorful with southwestern flair.
Note: Drain tomatoes and beans well to maintain crispiness.
Cheesy Bacon Crunchwrap
Add crispy bacon strips alongside the sausage and double the cheese for an ultra-rich, indulgent crunchwrap. The smoky bacon enhances the savory profile and adds crunch inside.
Note: Cook bacon until crisp and drain excess fat before assembly.
Sweet Potato Breakfast Crunchwrap
Roast diced sweet potatoes with cinnamon and add to the filling for a sweet-savory combo. Pair with cheddar and sausage for a comforting breakfast that feels like fall in every bite.
Note: Make sure sweet potatoes are tender and not overly moist before adding.
Nutrition
Per Serving:
Nutritional values are estimates and may vary based on specific ingredients used.
Storage & Tips
Room Temperature
Keep leftover crunchwraps covered at room temperature for up to 2 hours. Beyond this, bacteria can grow, so refrigeration is recommended to maintain safety and freshness.
Refrigerator
Store crunchwraps in an airtight container in the fridge for up to 3 days. The texture may soften slightly when cold, so reheat before serving to restore crispiness.
Freezer
Wrap each crunchwrap tightly in plastic wrap and foil, then freeze for up to 2 months. This prevents freezer burn and preserves flavor and texture. Thaw overnight in the fridge before reheating.
Reheating
Reheat in a 350°F oven for 10-15 minutes or until heated through and crispy. Avoid microwaving alone as it makes the tortillas soggy; if using microwave, add a quick oven toast afterward.
Make Ahead
Prepare and assemble crunchwraps fully, then freeze before baking. On the day of serving, bake from frozen adding a few extra minutes to the baking time. This makes for easy, stress-free mornings.
FAQ
Can I make this recipe gluten-free?
Absolutely! Just swap regular flour tortillas for gluten-free tortillas that are flexible enough to fold. Keep in mind that some gluten-free tortillas might not crisp up quite as much, but the flavor will still be delicious.
What’s the best way to prevent soggy tortillas?
The key is to pre-cook and drain all fillings thoroughly to avoid excess moisture. Also, brushing the tortillas with butter and baking them flipped halfway helps achieve a crispy texture.
Can I prepare the filling the night before?
Yes! You can cook the sausage, vegetables, and scramble the eggs ahead of time. Store them separately in the fridge and assemble just before baking to keep tortillas crisp and fresh.
How do I store leftovers?
Store leftovers in an airtight container in the refrigerator for up to 3 days. Reheat in the oven to bring back the crispiness. Avoid microwaving alone as it can make the crunchwrap soggy.
Can I freeze the assembled crunchwraps before baking?
Yes, you can assemble and freeze them wrapped tightly. When ready, bake from frozen, adding a few extra minutes to the baking time. This makes for a convenient make-ahead breakfast.
What cheese works best in this recipe?
Cheddar cheese is classic and melts beautifully here, but feel free to use Monterey Jack, pepper jack for spice, or a blend. Avoid pre-shredded cheese with anti-caking agents for the best melt.
Can I add other fillings like potatoes or mushrooms?
Definitely! Just make sure any added fillings are cooked and moisture is drained to avoid sogginess. Roasted potatoes or sautéed mushrooms add great flavor and texture.
How do I keep the crunchwrap from falling apart?
Fold the edges of the top tortilla tightly under the bottom one to seal the filling. Press gently but firmly to create a compact pocket that holds together during baking.
Final Thoughts
Give this sheet pan breakfast crunchwrap a try—you’ll love how easy and delicious it is! Don’t forget to share your results; I’m excited to hear how it turns out for you.