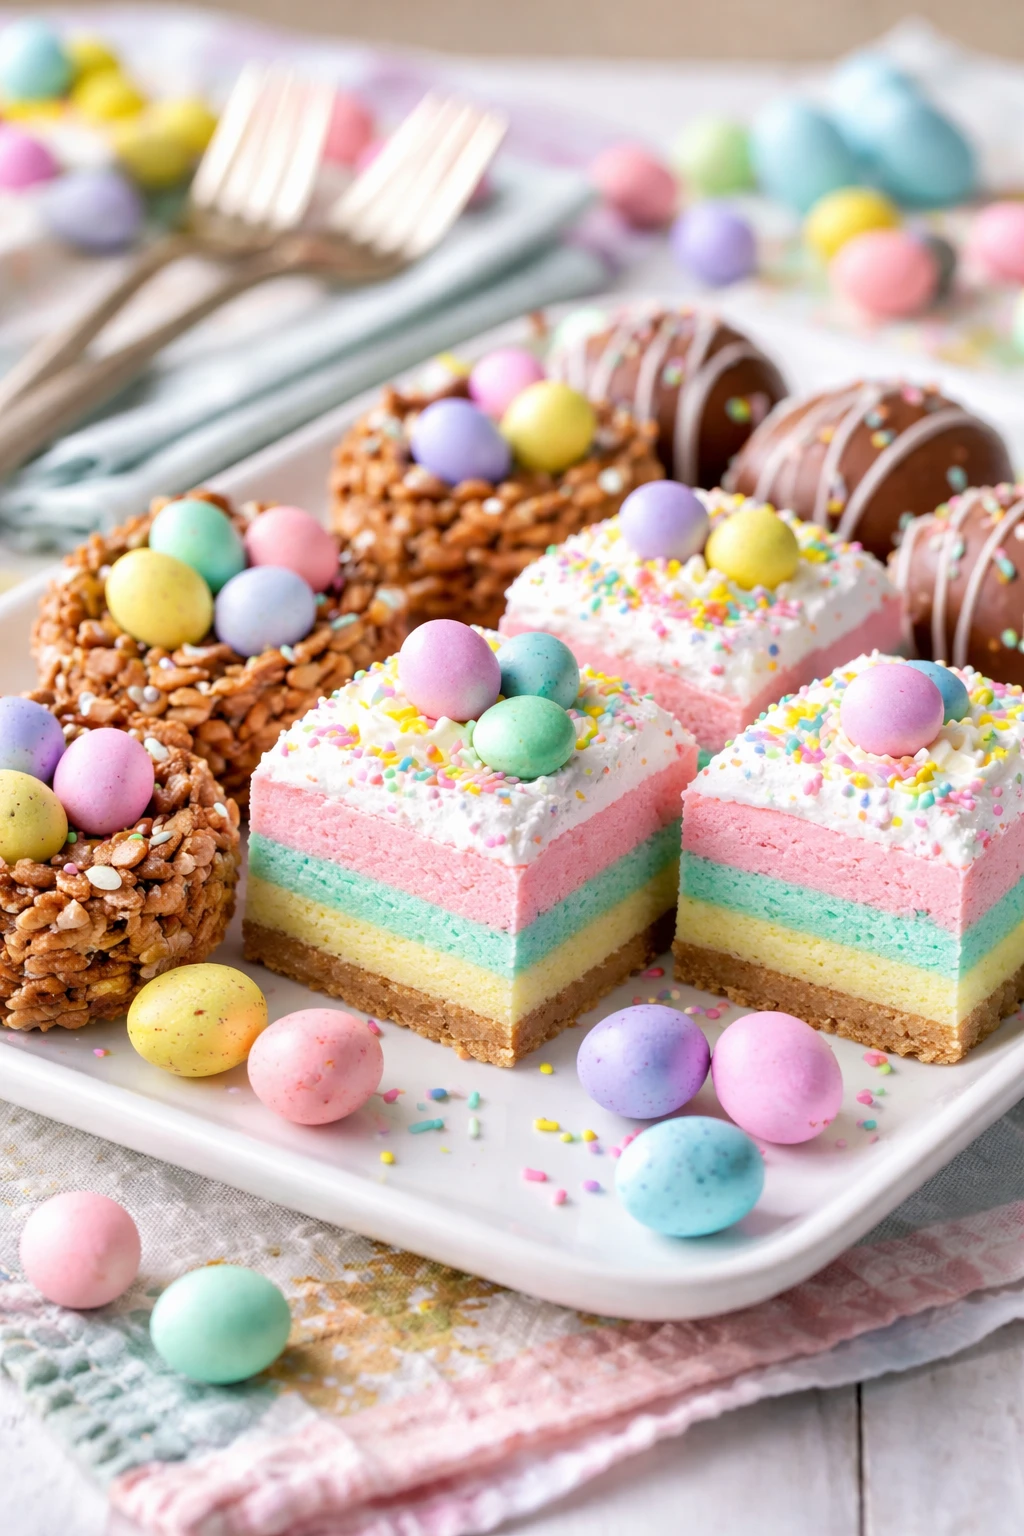
These no-bake Easter sweets are a lifesaver when you need a quick treat. Made with simple pantry staples and a fun mix-in, they come together in just minutes. Perfect for holiday sharing or gifting!
Introduction
I stumbled upon this no-bake Easter sweets recipe last spring when I needed a quick dessert for an impromptu family gathering. I wanted something festive, fun, and fast — no oven required because it was a warm day and I didn’t want the kitchen heating up. What makes these treats special is the mix of crispy rice cereal with mini pastel marshmallows and chopped dried apricots, which add a surprising chewy sweetness and a pop of color. I love how easy they are to whip up, and they’re a hit with kids and adults alike. The melted white chocolate binds everything with a creamy richness, making each bite irresistible. Plus, you can customize the mix-ins to suit your taste or what you have on hand. The finished sweets have a light crunch, a soft chew, and a gentle sweetness that’s perfect for spring celebrations or last-minute gifting. I’ve made these several times now, and each batch disappears fast — they’re just that good!
What You'll Need
Approximately 16 small pieces, 8 servings
- 2 cups crispy rice cereal, dry
- 1 cup white chocolate chips, melted
- 1/2 cup mini pastel marshmallows
- 1/3 cup chopped dried apricots
- 1 teaspoon vanilla extract
- 1/4 teaspoon salt
How To Do It
Step 1
Start by melting the white chocolate chips in a microwave-safe bowl, heating in 30-second intervals and stirring in between. This slow melting prevents the chocolate from burning and ensures a smooth texture that will coat the cereal evenly. Be patient here; rushing it can cause the chocolate to seize or become grainy, which would affect the final texture of the sweets.
⏱ Time: 3 minutes
✓ Doneness: Chocolate is fully melted, smooth, and glossy without lumps.
Step 2
Once the chocolate is melted, stir in the vanilla extract and salt. These small additions balance the sweetness and enhance the overall flavor complexity. Stir gently but thoroughly to make sure everything is well combined, which helps the chocolate mixture coat the cereal evenly.
⏱ Time: 1 minute
✓ Doneness: Mixture is homogenous with no separation.
Step 3
In a large mixing bowl, combine the crispy rice cereal, mini pastel marshmallows, and chopped dried apricots. Toss them together to distribute the mix-ins evenly before adding the chocolate. This ensures every bite has a bit of everything and prevents clumps of marshmallows or apricots in one spot.
⏱ Time: 2 minutes
✓ Doneness: Ingredients are evenly mixed with no clusters.
Step 4
Pour the melted white chocolate mixture over the cereal mixture. Use a spatula to gently fold and stir until all the cereal and mix-ins are coated. Be careful not to overmix or press too hard, or you’ll crush the cereal and lose the crunch that makes these sweets so delightful.
⏱ Time: 2 minutes
✓ Doneness: All pieces are lightly coated, no dry cereal visible.
Step 5
Line a square baking pan with parchment paper. Transfer the coated mixture into the pan and press it down firmly but gently with the back of a spatula or your hands. Pressing ensures the mixture holds together when cut but avoid compressing it too much or the treats will be dense rather than light and airy.
⏱ Time: 3 minutes
✓ Doneness: Mixture is evenly pressed, surface is smooth and compact.
Step 6
Place the pan in the refrigerator for at least 30 minutes to allow the chocolate to set. Chilling firms up the sweets so they’ll cut cleanly and hold their shape. If you try to cut them too soon, they’ll be sticky and crumbly.
⏱ Time: 30 minutes
✓ Doneness: Sweets are firm to the touch and chocolate is solid.
Step 7
After chilling, remove the sweets from the pan using the parchment paper edges. Place on a cutting board and slice into small squares or rectangles using a sharp knife. Wipe the knife clean between cuts to keep edges neat and prevent sticking.
⏱ Time: 5 minutes
✓ Doneness: Squares have clean edges and hold together well.
Step 8
Arrange the cut sweets on a serving platter or package them in gift bags. They’re ready to enjoy immediately or store for later. These treats keep their texture best when stored in an airtight container in a cool place.
⏱ Time: 2 minutes
✓ Doneness: Sweets look neat and appetizing on display.
Step 9
Optional: For an extra festive touch, drizzle a little melted colored candy melts or sprinkle additional mini marshmallows on top before chilling. This adds a pop of color and makes them even more eye-catching for Easter celebrations.
⏱ Time: 5 minutes
✓ Doneness: Decorations are set and vibrant on the finished sweets.
Pro Tips
Melt white chocolate slowly in short bursts to avoid burning.
White chocolate has a low melting point and can seize or burn quickly if heated too fast. Melting in 20-30 second intervals with stirring prevents overheating and ensures a smooth, glossy coating for the cereal mixture.
Press the mixture firmly but gently into the pan.
Pressing helps the treats hold together when cut without crushing the cereal’s delicate crunch. Too much pressure can make them dense and hard, losing the light texture that makes these sweets enjoyable.
Use parchment paper to line your pan for easy removal.
Parchment paper prevents sticking and allows you to lift the entire slab out of the pan easily. This avoids breaking or crumbling when transferring to a cutting board.
Chill the treats thoroughly before cutting.
Allowing the chocolate to fully set in the fridge ensures clean cuts and prevents the sweets from falling apart. If cut too soon, the bars will be sticky and crumbly.
Customize mix-ins to suit your taste or occasion.
Swapping dried apricots for cranberries, nuts, or sprinkles lets you create unique flavor profiles while keeping the basic technique intact. This flexibility makes the recipe versatile for various holidays or preferences.
Use a sharp knife and wipe it clean between cuts.
A sharp knife cuts cleanly through the firm treats without crushing them. Wiping the blade prevents sticky buildup that can tear or crumble the edges.
Store treats in an airtight container at a cool temperature.
Keeping them airtight and cool preserves texture and prevents the chocolate from sweating or melting. Warm environments cause the sweets to become sticky and lose their shape.
Common Mistakes to Avoid
Melting chocolate too quickly or overheating it.
Why it happens Many rush the melting process in the microwave or over direct heat, causing white chocolate to seize or burn.
Fix Melt chocolate in short bursts (20-30 seconds), stirring frequently. Use a double boiler if preferred for gentler heat control.
Not chilling the mixture before cutting.
Why it happens Impatience or lack of planning leads to cutting while treats are still soft and sticky.
Fix Allow at least 30 minutes in the fridge until the chocolate is fully set and the mixture is firm to the touch.
Pressing the mixture too hard into the pan.
Why it happens Thinking firmer means better shape, some press excessively and crush the cereal.
Fix Press gently but firmly just enough to bind the mixture without losing the crispy texture.
Using flavored or sweetened cereals.
Why it happens Using flavored cereals affects the balance of sweetness and can make the treats too sugary or strange tasting.
Fix Stick to plain crispy rice cereal for the best texture and flavor balance.
Skipping the parchment paper lining.
Why it happens Not lining the pan leads to sticking and difficulty removing the treats intact.
Fix Always line the pan with parchment paper to easily lift out the treats after chilling.
Variations
Chocolate Peanut Butter No-Bake Sweets
Swap white chocolate for melted peanut butter and dark chocolate chips. Add chopped peanuts for crunch. These have a richer, nuttier flavor and a denser texture but remain just as easy to make.
Note: Peanut butter binds differently than white chocolate, so press mixture firmly and chill longer for best results.
Vegan No-Bake Easter Treats
Use dairy-free white chocolate or coconut butter and vegan marshmallows. Swap dried apricots for dried mango or raisins. The texture stays light and chewy, perfect for plant-based diets.
Note: Check melting temps for vegan chocolate to avoid overheating; chill well to set firmly.
Add Citrus Zest for a Fresh Twist
Mix in finely grated orange or lemon zest with the melted chocolate. This adds a bright, fresh flavor that complements the sweetness and makes the treats feel lighter and more spring-like.
Note: Use zest sparingly to avoid bitterness; add after melting chocolate but before combining with cereal.
Add Toasted Coconut and Almonds
Fold in toasted shredded coconut and slivered almonds for a tropical crunch. This variation adds texture contrast and a nutty flavor that pairs beautifully with white chocolate and marshmallows.
Note: Toast coconut and almonds lightly to avoid bitterness; allow to cool before mixing.
Sprinkle with Colored Sugar or Edible Glitter
Before chilling, sprinkle colored sugar crystals or edible glitter on top for extra sparkle and festive flair. Great for parties or gift presentation.
Note: Apply sprinkles gently to avoid disturbing the pressed surface; press lightly to help them stick.
Nutrition
Per Serving:
Nutritional values are estimates and may vary based on specific ingredients used.
Storage & Tips
Room Temperature
These no-bake sweets can safely keep at room temperature for up to 24 hours if stored in an airtight container away from direct sunlight or heat. Beyond that, they may start to soften or lose texture.
Refrigerator
Store leftovers in an airtight container in the refrigerator for up to 5 days. The treats will firm up and retain their shape but may become slightly denser. They’re best served chilled or at room temperature.
Freezer
Freeze in a sealed container or freezer bag for up to 2 months. Wrap tightly with plastic wrap before placing in a container to prevent freezer burn. Thaw in the refrigerator overnight and bring to room temperature before serving to restore texture.
Reheating
No reheating needed. If desired, let the treats sit at room temperature for 10-15 minutes to soften slightly before enjoying. Avoid microwaving as it can melt the chocolate and ruin texture.
Make Ahead
You can prepare the mixture and press it into the pan 1-2 days ahead, then chill until ready to cut and serve. This recipe is great for last-minute dessert prep since it sets quickly and stores well.
FAQ
Can I use regular marshmallows instead of mini ones?
Yes, but mini marshmallows distribute more evenly and melt slightly during mixing, which helps bind the treats better. Using large marshmallows may cause clumps and uneven texture, so chop them finely if needed.
What if I don’t have white chocolate chips?
You can substitute with white chocolate bars chopped into small pieces or use a combination of white and milk chocolate for a different flavor. Just make sure to melt gently and avoid overheating.
Can I add nuts or seeds to this recipe?
Absolutely! Chopped nuts or seeds add great crunch and flavor. Just fold them in with the cereal and mix-ins. Be mindful of allergies and adjust quantities to keep the mixture balanced.
How long do these sweets last?
Stored properly in an airtight container in the fridge, these treats last about 5 days. At room temperature, they’re best eaten within 24 hours to maintain texture and freshness.
Can I make these gluten-free?
Yes, just ensure you use gluten-free crispy rice cereal. Most plain rice cereals are gluten-free, but always check the label to avoid cross-contamination.
Why did my treats turn out sticky and crumbly?
This usually happens if the chocolate wasn’t fully melted or if the mixture wasn’t chilled long enough before cutting. Make sure to melt chocolate smoothly and refrigerate for at least 30 minutes for firm bars.
Is there a way to make these less sweet?
You can reduce the amount of white chocolate slightly or choose semi-sweet chocolate instead. Adding more dried fruit or nuts can also balance the sweetness with natural flavors.
Can I add flavor extracts other than vanilla?
Yes! Almond, coconut, or orange extracts can add interesting twists. Use sparingly (around 1/2 teaspoon) to avoid overpowering the chocolate and other flavors.
Final Thoughts
Give these no-bake Easter sweets a try — they’re simple, fun, and perfect for spring gatherings. I’d love to hear how yours turn out, so don’t forget to share your photos and tweaks!