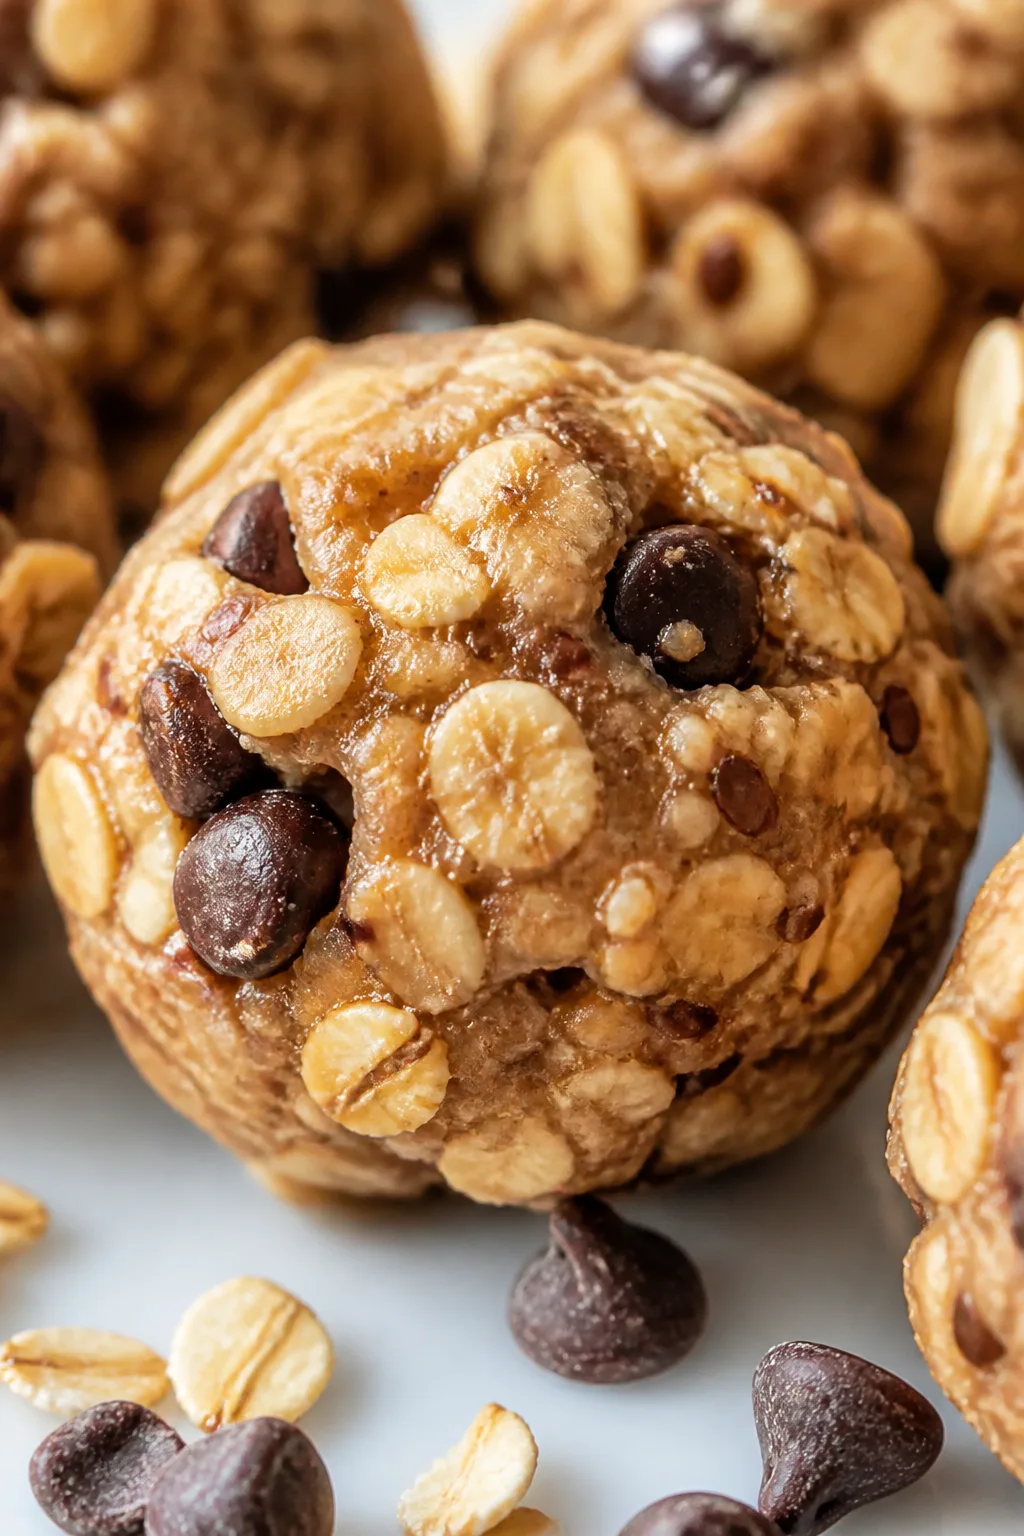
These simple toddler snacks are wholesome and easy to make, with a gentle hint of cinnamon that adds warmth. Perfect for little hands to munch on during afternoon snack time or packed in lunchboxes for a nutritious treat.
Introduction
I first made these toddler snacks when I was desperate for something simple and wholesome that my little one could easily hold and enjoy. The usual store-bought options often felt too processed or loaded with sugar, so I wanted something natural but still tasty. Adding cinnamon was a happy accident — it gives just the right warm flavor without being overpowering. What makes this recipe stand out for me is how easily the ingredients come together without any fancy gadgets, and the texture is soft yet holds shape well enough for tiny hands. It’s a snack that feels nourishing and comforting, perfect for afternoon munchies or a little lunchbox surprise. I’ve tried a few versions before settling on this balance where it’s sweet but not too much, moist but not sticky. Plus, using mashed bananas and applesauce keeps it naturally sweet and adds moisture, so no extra oils are needed. Honestly, these little bites have become a staple in our house, and I love how easy it is to whip them up whenever snack time rolls around.
What You'll Need
Approximately 12 small snack bites, 4 servings
- 1 cup rolled oats, lightly processed
- 1/2 cup mashed ripe banana
- 1/4 cup unsweetened applesauce
- 1/2 teaspoon ground cinnamon
- 1 tablespoon honey (optional, for toddlers over 1 year)
- 1/4 teaspoon baking powder
- Pinch of salt
How To Do It
Step 1
Preheat your oven to 350°F (175°C) and line a baking sheet with parchment paper. This step is important to ensure your snacks cook evenly without sticking. Getting the oven ready early helps maintain consistent heat, which is key for the right texture. Skipping this can lead to uneven cooking or sticking, so take a moment here.
⏱ Time: 5 minutes
✓ Doneness: Oven preheated and parchment paper fully flat and secure on baking tray
Step 2
In a medium bowl, mash the ripe banana thoroughly using a fork until mostly smooth. The banana acts as a natural binder and sweetener, so mashing it well ensures the snacks hold together and have a consistent texture. If chunks remain, the bites might crumble or bake unevenly, so take time here.
⏱ Time: 3 minutes
✓ Doneness: Banana is mostly smooth with no large lumps
Step 3
Add the applesauce, honey (if using), and ground cinnamon to the mashed banana. Stir gently to combine. The applesauce adds moisture and subtle sweetness, while cinnamon provides a warm flavor note that’s comforting but mild. Mixing these ingredients well helps distribute flavors evenly throughout the dough.
⏱ Time: 2 minutes
✓ Doneness: Mixture is uniform in color and texture
Step 4
In a separate bowl, whisk together the rolled oats, baking powder, and a pinch of salt. This dry mix helps with even rising and flavor balance. The oats provide texture and fiber, while baking powder adds just enough lift to keep the snacks tender but not cakey.
⏱ Time: 2 minutes
✓ Doneness: Dry ingredients are well combined with no clumps
Step 5
Slowly fold the dry oat mixture into the wet banana mixture. Use a spatula and fold gently to avoid overmixing, which can lead to tough snacks. The goal is a sticky but scoopable dough that holds shape when pressed together. If it feels too wet, add a bit more oats; if too dry, a splash of applesauce helps.
⏱ Time: 3 minutes
✓ Doneness: Dough holds together when pressed, slightly sticky but not runny
Step 6
Using a spoon or your hands, form small bite-sized balls or patties and place them spaced about an inch apart on the prepared baking sheet. Press them lightly flat so they bake evenly. Making them uniform in size helps them cook at the same rate and ensures toddlers can easily handle them.
⏱ Time: 5 minutes
✓ Doneness: All snacks are uniform in size and shape on the tray
Step 7
Bake in the preheated oven for about 20-25 minutes. You want them to be lightly golden on the edges but still soft inside. Overbaking can dry them out which toddlers might find hard to chew. Keep an eye on them in the last 5 minutes to catch the perfect tender texture.
⏱ Time: 20-25 minutes
✓ Doneness: Edges are golden and centers feel firm but soft to touch
Step 8
Remove the snacks from the oven and let them cool completely on the baking sheet. Cooling allows them to firm up a bit more which makes them easier for little hands to pick up and less likely to crumble. Trying to eat them warm might be too soft and sticky.
⏱ Time: 10 minutes
✓ Doneness: Snacks are cool to the touch and hold shape when picked up
Step 9
Store the cooled snacks in an airtight container at room temperature for up to 2 days or refrigerate for longer freshness. They’re perfect for packing into lunchboxes or just a quick snack on the go. You can warm them slightly before serving if desired.
⏱ Time: N/A
✓ Doneness: Snacks stored properly and ready to enjoy
Pro Tips
Use very ripe bananas for natural sweetness and moisture.
Ripe bananas break down more easily when mashed, creating a smooth texture that binds ingredients well. They also add natural sugars, reducing the need for added sweeteners. Using underripe bananas can result in a less sweet, denser snack that toddlers may not enjoy.
Don’t overmix the oat mixture with wet ingredients.
Overmixing can develop the oats' starches too much, leading to a tougher texture. Gentle folding just until combined keeps the snacks tender and soft, which is ideal for little mouths. It also prevents the dough from becoming too dense or gummy.
Press the snack dough lightly before baking for even cooking.
Flattening the dough balls ensures that heat penetrates evenly, preventing the centers from staying too moist or undercooked. It also helps the snacks maintain a uniform shape, making them easier for toddlers to hold and eat.
Use parchment paper for easy removal and cleanup.
Parchment paper prevents sticking and helps maintain the shape of the snacks. Without it, the snacks can stick to the baking tray, breaking apart when you try to remove them. It also speeds up cleanup, which is always a win in busy kitchens.
Cool the snacks completely before serving or storing.
Cooling allows the snacks to firm up, making them less sticky and easier for toddlers to handle. Serving them warm can cause them to crumble or stick to fingers, which can be frustrating for little ones and messy.
Store snacks in an airtight container to keep freshness.
Exposure to air causes moisture loss and staleness. Airtight containers preserve texture and flavor, ensuring the snacks stay soft and tasty for days. If refrigerated, they last longer but can dry out if not sealed properly.
Try adding a small handful of finely chopped nuts or seeds for texture.
Introducing mild textures like chopped nuts or seeds can add interest and nutrition, but be sure they’re finely chopped to avoid choking hazards. This also helps toddlers develop chewing skills gradually with safe, manageable bites.
Common Mistakes to Avoid
Using underripe bananas
Why it happens Sometimes people grab bananas that look firm and yellow but aren’t ripe enough, assuming they’ll taste fine. It’s easy to overlook ripeness when in a hurry.
Fix Wait until bananas have brown spots and feel soft to the touch. Ripe bananas mash easily and provide natural sweetness and moisture, which are essential for the right texture and flavor in these snacks.
Overbaking the snacks
Why it happens Many assume longer baking equals better cooking, so they leave snacks in too long to be safe. This dries them out.
Fix Set a timer and check snacks around 20 minutes. Look for golden edges and a firm but soft center. Remove from oven promptly to retain moisture and tenderness.
Skipping parchment paper
Why it happens To save time or dishes, some skip lining the baking sheet, not realizing snacks will stick.
Fix Always use parchment paper or a silicone mat. It prevents sticking and keeps the snacks intact, making removal easy and mess-free.
Mixing the dough too vigorously
Why it happens In an attempt to combine ingredients quickly, some overmix the batter.
Fix Fold ingredients gently until just combined. Overmixing toughens the oats and creates a dense texture that’s hard for toddlers to eat.
Making snacks too large
Why it happens Sometimes snacks are made too big, thinking bigger is better for toddlers.
Fix Make small, bite-sized snacks that are easy for little hands to pick up and chew safely. Larger snacks may be difficult to handle and pose choking risks.
Variations
Pumpkin Spice Toddler Bites
Swap the applesauce for pumpkin puree and add a pinch of nutmeg and ginger along with the cinnamon. This gives a cozy fall flavor that’s still gentle on little palates. The texture remains soft and moist, perfect for autumn snack time.
Note: Pumpkin puree has similar moisture content to applesauce, so no adjustment in dry ingredients is needed.
Berry Oat Toddler Snacks
Add a handful of finely chopped fresh or frozen berries to the dough for a fruity twist. Berries add natural sweetness and antioxidants, plus a bit of color. The texture becomes slightly juicier but still holds well after baking.
Note: Fold berries in gently to avoid breaking them up and turning the dough too wet.
Peanut Butter Banana Toddler Snacks
Incorporate 2 tablespoons of smooth peanut butter into the wet mixture for added protein and flavor. This variation is great for toddlers without nut allergies and adds richness and a creamy texture.
Note: Reduce applesauce slightly if the dough feels too wet after adding peanut butter.
No-Bake Toddler Snack Balls
Mix the mashed banana, oats, cinnamon, and applesauce, then roll into balls and chill instead of baking. These no-bake bites are quick and chewy, great for hot days or when oven use isn’t convenient.
Note: Chill for at least 1 hour to firm up before serving.
Vegan Toddler Treats
Use maple syrup instead of honey and ensure applesauce and oats are vegan-certified. This keeps the recipe fully plant-based while maintaining the same soft texture and warm cinnamon flavor toddlers love.
Note: No other changes needed; baking time remains the same.
Nutrition
Per Serving:
Nutritional values are estimates and may vary based on specific ingredients used.
Storage & Tips
Room Temperature
These snacks can be safely kept at room temperature for up to 24 hours when stored in an airtight container. Keeping them covered prevents drying out and preserves softness, making them easy to grab on the go.
Refrigerator
Store leftover snacks in an airtight container in the fridge for up to 4 days. Chilling can firm them up further; warm slightly before serving to restore softness. Avoid leaving them uncovered to prevent drying.
Freezer
Freeze the snacks in a single layer on a baking sheet, then transfer to a freezer-safe container or bag for up to 2 months. Thaw overnight in the fridge and warm gently to refresh texture. Proper wrapping prevents freezer burn and flavor loss.
Reheating
Reheat snacks in a microwave for 15-20 seconds or in a low oven (300°F) for 5-7 minutes. Adding a small splash of water before warming helps retain moisture. Avoid overheating as it can dry them out and harden the texture.
Make Ahead
You can prepare the dough up to 24 hours ahead and store it tightly wrapped in the fridge. Shape and bake the day you plan to serve for the freshest texture. Alternatively, bake and freeze for quick snack options later.
FAQ
Can I make these snacks without honey for toddlers under 1 year?
Absolutely! Honey is optional and mainly for added sweetness for toddlers over 1 year old. The mashed banana and applesauce provide enough natural sweetness, so you can safely omit honey for younger toddlers without affecting texture.
What if my dough feels too wet or too dry?
If the dough is too wet and sticky, add a tablespoon more rolled oats gradually until it holds shape. If it’s too dry and crumbly, add a teaspoon of applesauce or mashed banana to moisten. The dough should be sticky but scoopable to form small bites easily.
Can I use gluten-free oats for this recipe?
Yes, gluten-free rolled oats work well and make these snacks suitable for gluten-sensitive toddlers. Just ensure your oats are certified gluten-free to avoid cross-contamination.
How do I store leftovers to keep them fresh?
Store snacks in an airtight container at room temperature for 1 day or refrigerate for up to 4 days. Chilling can firm them up but reheat slightly before serving to soften. Avoid leaving them uncovered to prevent drying out.
Can I add other flavors or mix-ins?
Definitely! Adding mild spices like nutmeg or finely chopped soft fruits like berries works nicely. For protein, smooth nut butters can be mixed in if no allergies exist. Just adjust moisture as needed and keep pieces small for safety.
Are these snacks suitable for freezing?
Yes, they freeze well. Freeze in a single layer first, then transfer to a sealed container. Thaw overnight in the fridge and warm gently before serving. This is a great way to have ready-made snacks on hand.
What texture should I expect in the finished snacks?
They should be soft and tender with a slight chew from the oats. The edges will be lightly golden but the center stays moist and easy to chew—perfect for toddlers developing their eating skills.
Can I make these snacks vegan?
Yes! Simply replace honey with maple syrup or omit it altogether, and use certified vegan applesauce and oats. The texture and flavor remain just as delicious and toddler-friendly.
Final Thoughts
I hope you and your little ones enjoy these cozy, wholesome toddler snacks as much as my family does. Don’t forget to share how they turn out — I love hearing your stories!