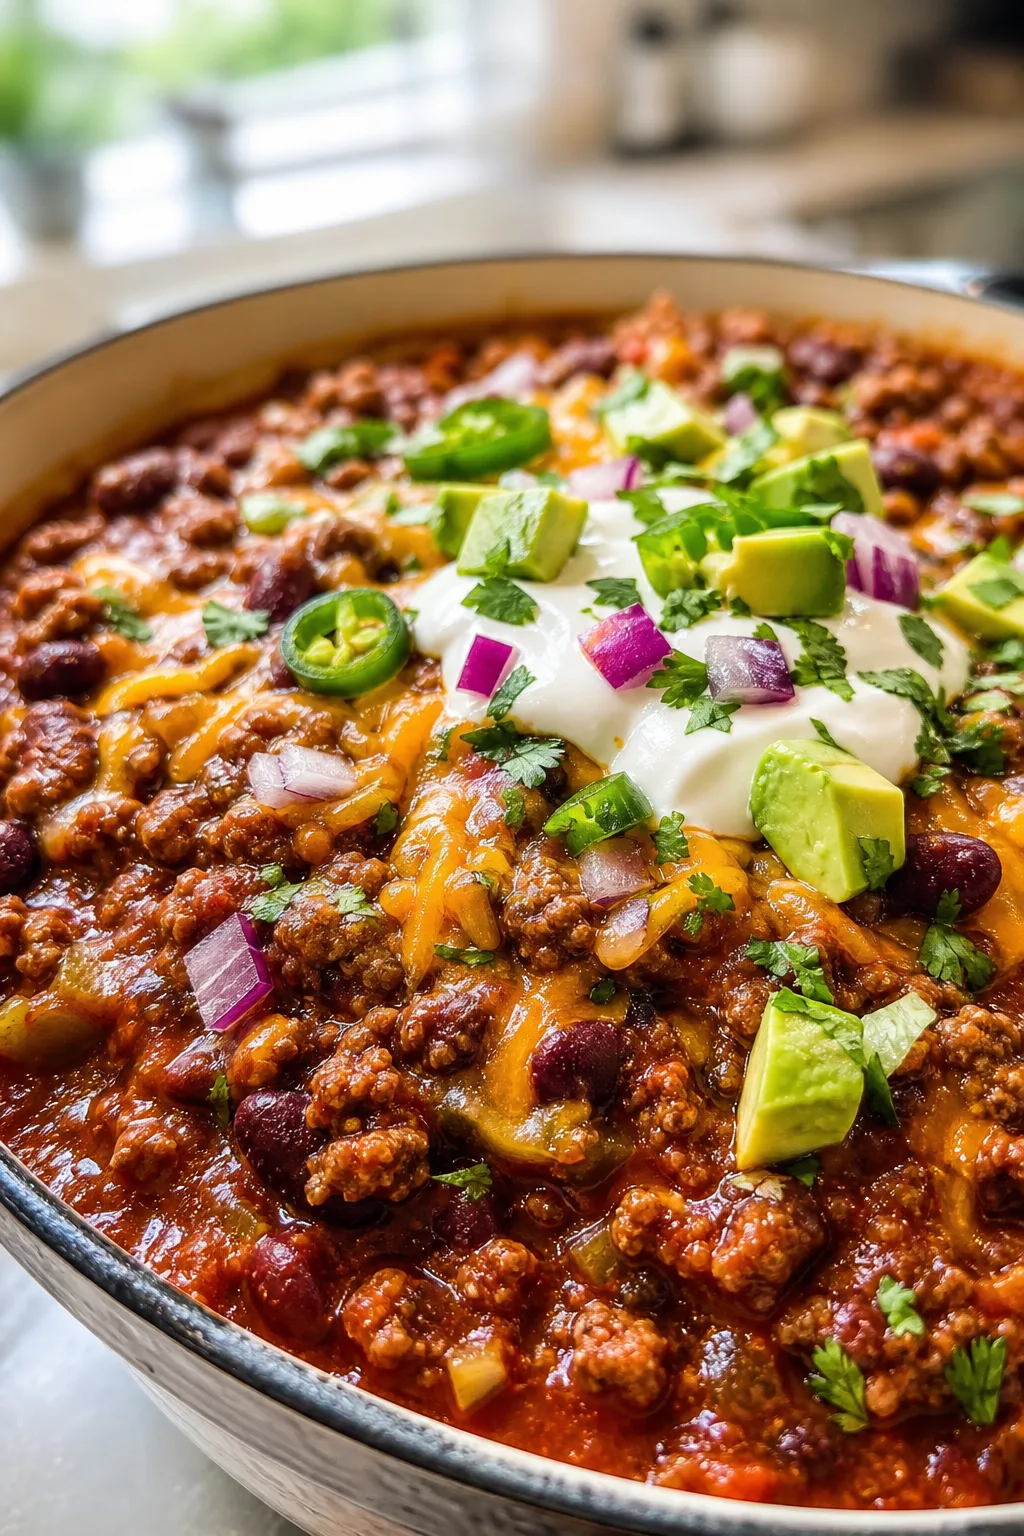
This campfire chili is the ultimate comfort food for chilly evenings outdoors. It’s loaded with simple ingredients, simmered slowly for deep flavor, and perfect for sharing around the fire.
Introduction
I first made this campfire chili a few years ago during a chilly fall camping trip with friends. We wanted something easy to cook over the fire that would warm us up and fill us up after a day of hiking. This recipe uses simple pantry ingredients but packs a lot of flavor thanks to a slow simmer and a touch of smoked paprika. Over time, I’ve tweaked it to get the perfect balance between spicy and savory without being overpowering. The secret is to brown the meat well and let the chili bubble gently so the flavors meld together beautifully. The finished chili is thick, hearty, and comforting — just what you want on a cool night outdoors. Plus, it’s super easy to double or halve depending on your group size. I love how this chili brings everyone together around the fire, sharing stories and enjoying a warm, satisfying meal. It’s definitely become a go-to for my camping trips and backyard fire pit evenings alike.
What You'll Need
About 6 generous servings
- 1 tablespoon olive oil
- 1 medium onion, diced
- 3 cloves garlic, minced
- 1 pound ground beef or turkey, browned
- 1 can (15 oz) kidney beans, drained and rinsed
- 1 can (14.5 oz) diced tomatoes
- 1 cup beef or vegetable broth
- 2 tablespoons chili powder
- 1 teaspoon ground cumin
- 1/2 teaspoon smoked paprika
- Salt and pepper to taste
How To Do It
Step 1
Heat olive oil in a large pot or cast iron skillet over medium heat. Add diced onions and cook, stirring occasionally, until they become translucent and soft, about 5 minutes. This step develops sweetness and depth in the chili base. Avoid rushing the onions or cooking them too quickly, as browning unevenly can add bitterness instead of flavor.
⏱ Time: 5
✓ Doneness: Onions look translucent and slightly softened without browning
Step 2
Add minced garlic to the onions and cook for 1-2 minutes until fragrant. Stir constantly to avoid burning the garlic, which can turn bitter and ruin the dish’s flavor. This step adds aromatic depth that complements the spices.
⏱ Time: 2
✓ Doneness: Garlic aroma fills the kitchen, but garlic remains pale
Step 3
Add the ground beef or turkey to the pot. Break it apart with a spoon and cook over medium-high heat until browned and no longer pink, about 7-8 minutes. Browning the meat properly is key for flavor through Maillard reaction, which creates savory, complex notes in the chili. Avoid overcrowding the pan to ensure even browning.
⏱ Time: 8
✓ Doneness: Meat is evenly browned with no pink spots
Step 4
Drain excess fat if needed, then stir in chili powder, cumin, smoked paprika, salt, and pepper. Toast the spices in the meat mixture for about 1 minute to release their oils and boost their flavor. This technique intensifies the chili’s aroma and taste.
⏱ Time: 1
✓ Doneness: Spices smell fragrant and well blended into meat
Step 5
Pour in diced tomatoes with their juices and broth. Stir to combine everything well. The broth helps create a nice sauce while the tomatoes add acidity and sweetness to balance the spices. Don’t skip the broth or the chili may be too thick or dry.
⏱ Time: 2
✓ Doneness: Mixture looks saucy and evenly mixed
Step 6
Add the drained kidney beans and stir gently to incorporate without mashing them. Beans add heartiness and protein, making the chili a filling meal. Be careful not to stir too aggressively to keep the beans intact for texture.
⏱ Time: 1
✓ Doneness: Beans are evenly distributed without breaking apart
Step 7
Bring the chili to a gentle simmer, then reduce heat to low. Cover the pot partially and let it simmer for 20-25 minutes, stirring occasionally. Slow simmering lets flavors meld and the sauce thicken naturally. Avoid boiling vigorously, which can toughen the beans and evaporate too much liquid.
⏱ Time: 25
✓ Doneness: Chili thickens slightly and smells rich and hearty
Step 8
Taste and adjust seasoning with salt, pepper, or more chili powder if you want extra heat. This final step lets you tailor the flavor to your preference. Remember flavors deepen after resting, so don’t over-season initially.
⏱ Time: 2
✓ Doneness: Balanced, flavorful taste with a mild kick
Step 9
Serve the chili hot with your favorite toppings like shredded cheese, sour cream, or chopped green onions. The creamy toppings add cool contrast and extra richness that pairs perfectly with the spicy warmth of the chili.
⏱ Time: 1
✓ Doneness: Chili is steaming hot with fresh, colorful toppings
Pro Tips
Don’t skip browning the meat thoroughly.
Browning meat triggers the Maillard reaction, creating complex flavors and a rich base for the chili. If you skip this or overcrowd the pan, the meat steams instead and lacks depth, resulting in a flat-tasting chili.
Simmer the chili gently, don’t boil it hard.
High heat can toughen beans and evaporate too much liquid, leaving a dry chili. A gentle simmer allows flavors to meld and the sauce to thicken naturally, producing a better texture and balanced taste.
Toast your spices briefly in the fat.
Toasting spices in the rendered fat releases their essential oils, boosting aroma and flavor complexity. This step makes a noticeable difference compared to just adding dry spices directly to the pot.
Rinse canned beans before adding.
Rinsing removes excess sodium and starch, which can thicken the chili too much or make it overly salty. It also helps prevent a metallic canned taste, keeping the chili fresh and bright.
Use smoked paprika to add a campfire touch.
Smoked paprika adds subtle smoky notes that mimic outdoor cooking flavors. It enhances the chili without overpowering other spices, giving your dish a cozy, authentic vibe.
Add toppings like sour cream or cheese right before serving.
Creamy toppings provide a cool contrast to the warm, spicy chili, balancing flavors and textures. Adding them just before serving keeps them fresh and visually appealing.
Adjust seasoning at the end after simmering.
Flavors deepen during cooking, so it’s best to season lightly at first and adjust after simmering. This prevents over-salting and lets you tailor the heat and saltiness to your liking.
Common Mistakes to Avoid
Not browning the meat properly
Why it happens Sometimes cooks rush this step or overcrowd the pan, causing the meat to steam rather than brown.
Fix Use a wide pan and cook the meat in batches if needed. Let it brown undisturbed for several minutes before stirring to develop those flavorful browned bits.
Boiling the chili too hard
Why it happens It’s easy to crank the heat up to speed things along, but this can toughen beans and dry out the sauce.
Fix Lower the heat once the chili simmers and keep it at a gentle bubble. Stir occasionally to prevent sticking but avoid vigorous boiling.
Adding spices too late or not toasting them
Why it happens Some skip toasting spices or add them only at the end, missing out on flavor development.
Fix Add spices after browning meat and toast them briefly in the fat to release oils and deepen flavor before adding liquids.
Not rinsing canned beans
Why it happens People often add beans straight from the can to save time, but canned liquid can be salty and starchy.
Fix Drain and rinse beans under cold water to remove excess sodium and starch, ensuring a cleaner taste and better texture.
Over-seasoning early
Why it happens Adding too much salt or spice at the start can lead to an overpowering chili after simmering.
Fix Season lightly in the beginning and adjust after cooking, tasting as you go to find the perfect balance.
Variations
Vegetarian Campfire Chili
Swap the meat for extra beans, diced sweet potatoes, or chopped mushrooms for a hearty vegetarian version. Add a bit of liquid smoke to keep that campfire flavor. This chili will be just as filling but with a plant-based twist.
Note: Cooking time may increase slightly with root vegetables. Be sure to simmer until veggies are tender.
Spicy Campfire Chili
Add diced jalapeños or a dash of cayenne pepper for an extra kick. This version is perfect if you love heat but still want the comforting flavors of classic chili.
Note: Add spicy ingredients early in cooking to mellow the heat or later for sharper spice.
Slow Cooker Campfire Chili
Brown meat and onions first, then transfer everything to a slow cooker. Cook on low for 6-8 hours or high for 3-4 hours. This hands-off method lets flavors develop beautifully with minimal effort.
Note: Add beans in the last hour to prevent them from becoming mushy.
Campfire Chili with Cornbread Topping
Prepare your favorite cornbread and crumble it on top of the chili just before serving. The sweet cornbread contrasts nicely with the spicy, savory chili for a comforting combo.
Note: Serve cornbread warm for best texture and flavor contrast.
Smoky Chipotle Campfire Chili
Add chipotle peppers in adobo sauce for a smoky, spicy twist. This variation brings a deep, smoky heat that pairs wonderfully with the paprika and cumin.
Note: Use chipotle sparingly at first—you can always add more to adjust heat.
Nutrition
Per Serving:
Nutritional values are estimates and may vary based on specific ingredients used.
Storage & Tips
Room Temperature
Chili can safely sit out covered for up to 2 hours. If you’re enjoying it outdoors, keep it covered to prevent bugs and debris.
Refrigerator
Store leftover chili in an airtight container for up to 4 days. The flavors deepen when chilled, but the texture may thicken. Reheat gently before serving, adding a splash of broth if needed.
Freezer
Freeze chili in airtight containers or heavy-duty freezer bags for up to 3 months. Thaw overnight in the fridge and reheat slowly to preserve texture and flavor.
Reheating
Reheat on the stovetop over medium-low heat, stirring occasionally. Add a little water or broth if it’s too thick. Avoid high heat to prevent burning or drying out.
Make Ahead
You can prepare the chili base a day ahead and refrigerate. Reheat and add beans the next day, simmering briefly to warm through. This saves time on busy days and improves flavor.
FAQ
Can I use other beans instead of kidney beans?
Absolutely! Black beans, pinto beans, or cannellini beans all work well. Just make sure to rinse canned beans before adding to the chili to reduce excess starch and salt. Different beans will slightly change texture but keep the heartiness.
How do I make this chili spicier?
Add diced jalapeños, cayenne pepper, or chipotle peppers to taste. Adding spicy ingredients early will mellow the heat, while adding them at the end keeps the kick sharper. Start small—you can always add more after tasting.
Can I make this chili vegetarian?
Yes! Simply omit the meat and add extra beans, vegetables like sweet potatoes or mushrooms, and a bit of smoked paprika or liquid smoke for that campfire flavor. Cook veggies until tender and adjust seasoning accordingly.
What’s the best way to store leftover chili?
Cool the chili to room temperature, then store in airtight containers in the fridge for up to 4 days. For longer storage, freeze in suitable containers for up to 3 months. Thaw overnight in the fridge before reheating gently.
Can I prepare this chili in a slow cooker?
Definitely! Brown the meat and onions first, then transfer everything into the slow cooker. Cook on low for 6-8 hours or high for 3-4 hours. Add beans in the last hour to keep them from getting mushy.
Why is browning the meat so important?
Browning triggers the Maillard reaction, creating rich, savory flavors and a deeper base for your chili. Skipping this step results in a blander dish since the meat won’t develop those complex taste notes.
How thick should the chili be when done?
It should be thick enough to coat the back of a spoon but still saucy. If it’s too watery, simmer uncovered a bit longer. If too thick, add a splash of broth or water to loosen it up.
Can I make this chili ahead for a party?
Yes! It actually tastes better the next day as flavors meld. Make it a day ahead, refrigerate, then reheat gently before serving. You can also keep it warm in a slow cooker during the event.
Final Thoughts
I hope you give this cozy campfire chili a try—it’s one of my favorite ways to bring warmth and comfort to any chilly night. Let me know how it turns out for you!