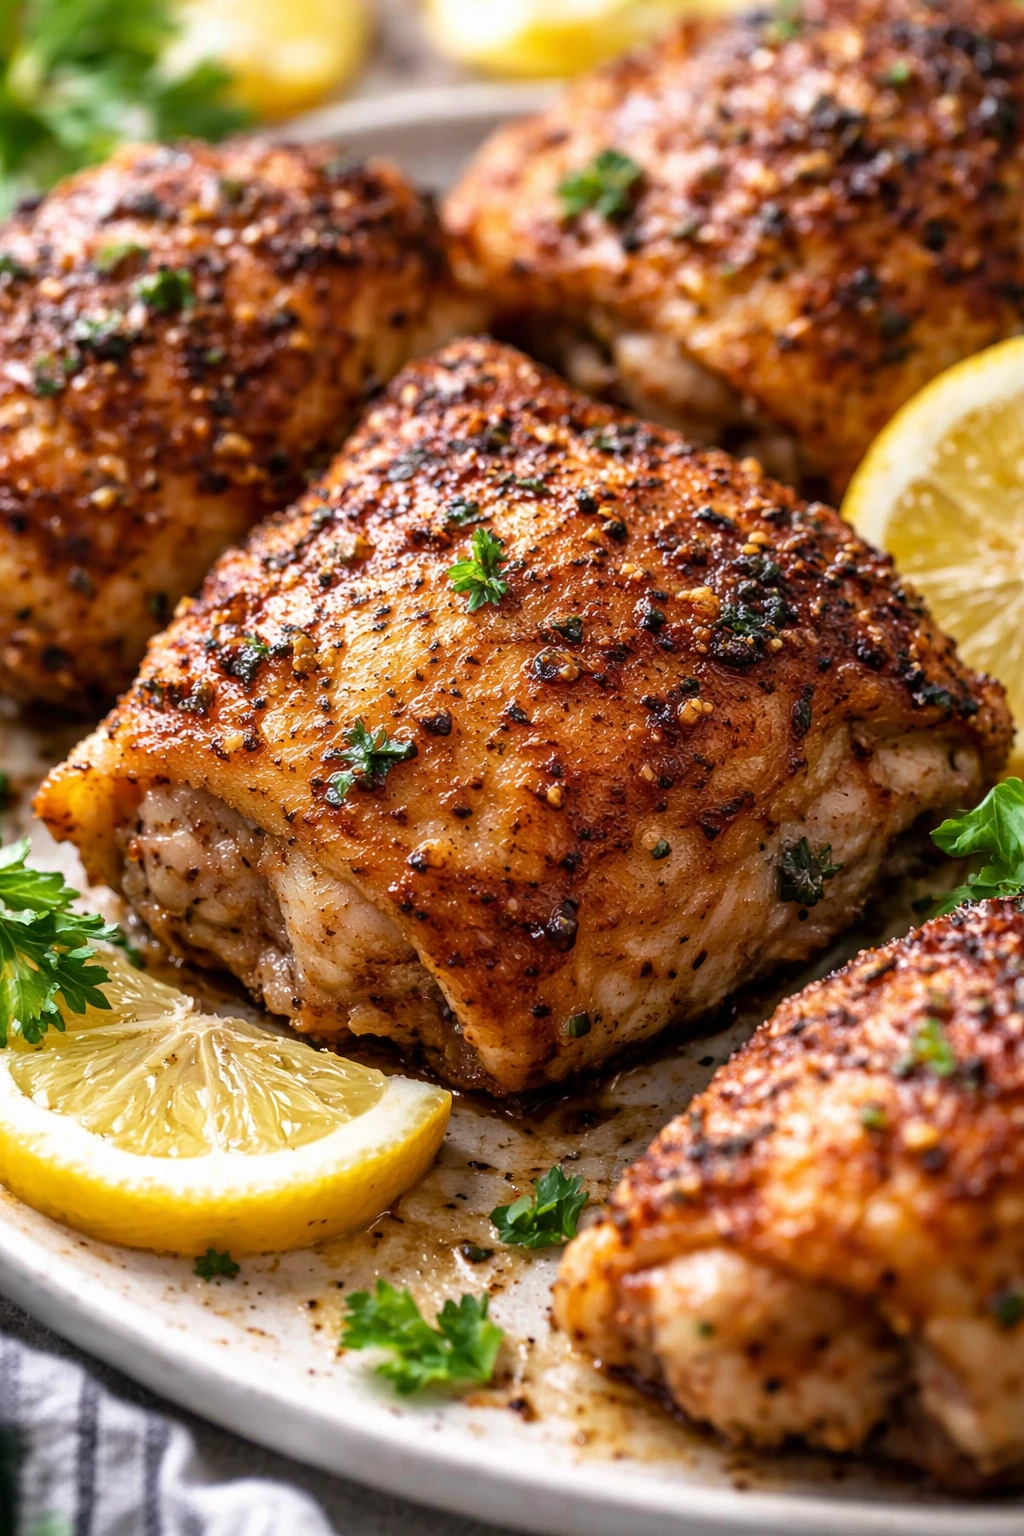
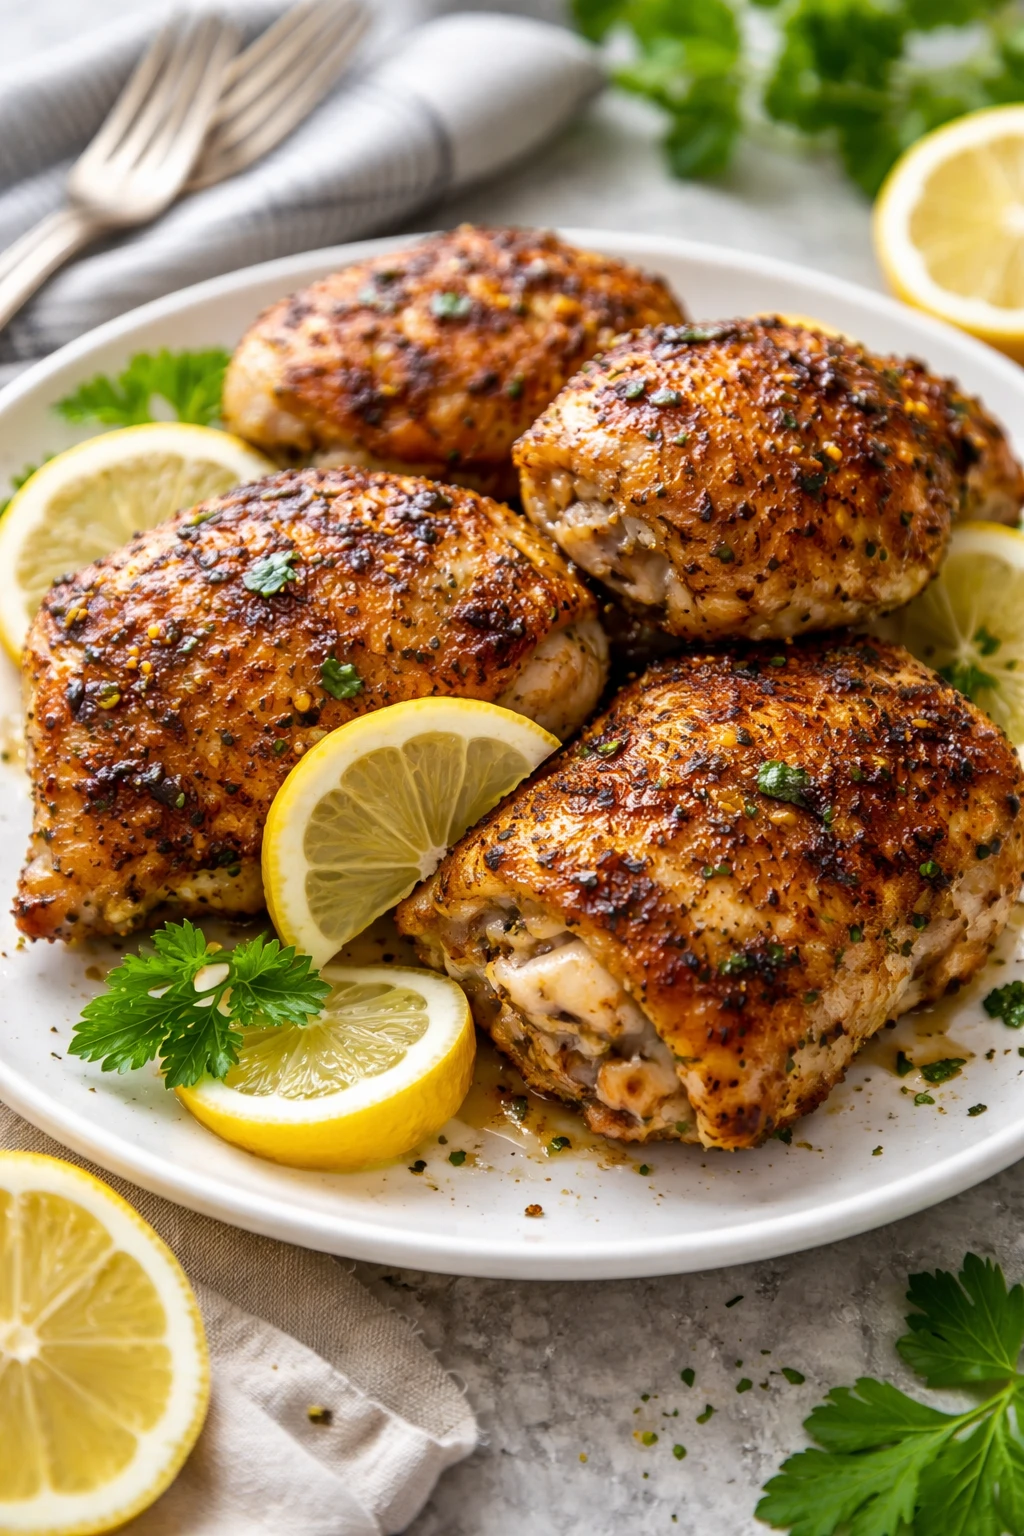
These lemon pepper chicken thighs come out perfectly crispy on the outside and tender inside thanks to the airfryer. I love how quick and fuss-free they are—great for busy weeknights or anytime you want a flavorful meal fast.
Introduction
I first tried making lemon pepper chicken thighs in the airfryer a couple of years ago when I wanted a quick dinner that felt a little special but didn’t require hours in the kitchen. I’d always loved the zingy brightness that lemon pepper seasoning brings, but getting the skin crispy without drying out the meat was a challenge with traditional oven baking. That’s when the airfryer came into the picture — it crisps the skin perfectly while locking in all the juicy flavor inside. This recipe is my go-to when I need a fuss-free weeknight meal that still tastes like I put in a lot of effort. The trick I learned is to pat the chicken skin dry before seasoning and to give the thighs enough space in the airfryer basket so the hot air can circulate well. The result? Golden, crispy skin with tender, flavorful meat every time. Plus, it’s ready in about 45 minutes total, including prep, which is a lifesaver on busy evenings. I like to serve mine with a squeeze of fresh lemon and a sprinkle of parsley for a pop of color and freshness. If you’re anything like me, you’ll appreciate how this recipe makes an impressive meal feel totally doable and stress-free.
How To Do It
Step 1
Start by patting the chicken thighs dry with paper towels. This step is crucial because removing excess moisture helps the skin crisp up nicely in the airfryer. If the skin is wet, it will steam instead of crisp, leaving it rubbery rather than crunchy. Be thorough but gentle, and don’t skip this step—it’s the foundation for that perfect golden skin you’re aiming for.
⏱ Time: 5 minutes
✓ Doneness: Skin feels dry to the touch and no visible moisture remains
Step 2
In a large bowl, toss the chicken thighs with olive oil, lemon pepper seasoning, garlic powder, salt, and black pepper. The oil helps the seasoning stick and promotes browning, while the lemon pepper brings that zesty punch. Make sure each thigh is evenly coated for consistent flavor and color. Rushing this step might lead to uneven seasoning and less flavorful bites.
⏱ Time: 5 minutes
✓ Doneness: Chicken thighs are evenly coated with a light sheen of oil and spices
Step 3
Preheat your airfryer to 400°F (200°C). Preheating ensures the chicken starts cooking immediately and helps the skin crisp up quickly. If you skip preheating, the thighs might cook unevenly or take longer, which can dry them out. Most airfryers only need about 3-5 minutes to reach temperature.
⏱ Time: 5 minutes
✓ Doneness: Airfryer display shows 400°F and indicates it’s ready
Step 4
Arrange the chicken thighs skin-side down in the airfryer basket in a single layer, making sure they aren’t touching. Crowding the basket will block the hot air circulation, resulting in uneven cooking and less crispy skin. Give each piece some breathing room for the best texture.
⏱ Time: 3 minutes
✓ Doneness: Chicken pieces lie flat without overlapping
Step 5
Cook the chicken thighs at 400°F for 12 minutes. This initial high heat helps start the crisping process on the skin. Don’t open the airfryer too often during cooking because it lets heat escape and can interfere with even cooking. You’ll notice the skin turning golden and starting to crisp up by the end of this step.
⏱ Time: 12 minutes
✓ Doneness: Skin is visibly golden and crispy on the exposed side
Step 6
Carefully flip the chicken thighs skin-side up and continue cooking for another 15-18 minutes. Flipping ensures the skin finishes crisping without burning and that the meat cooks through evenly. The internal temperature should reach 165°F (74°C) for safe consumption. Using a meat thermometer is the most reliable way to check doneness.
⏱ Time: 15-18 minutes
✓ Doneness: Skin is crispy all over and the meat registers 165°F internally
Step 7
Once cooked, remove the chicken thighs from the airfryer and let them rest for 5 minutes. Resting allows the juices to redistribute inside the meat, making each bite juicy and tender rather than dry. Resist the urge to cut in immediately, or you’ll lose all that flavorful moisture.
⏱ Time: 5 minutes
✓ Doneness: Chicken feels slightly firm but juicy when gently pressed
Step 8
Serve the chicken thighs with fresh lemon wedges and a sprinkle of chopped parsley if you like. The fresh lemon brightens the rich, savory flavors and adds a lovely aroma. Parsley adds a pop of color and freshness. This finishing touch elevates the dish and makes it feel restaurant-quality with minimal effort.
⏱ Time: 2 minutes
✓ Doneness: Lemon wedges are fresh and parsley is vibrant green
Step 9
Enjoy your perfectly cooked lemon pepper chicken thighs with your favorite sides—roasted veggies, a crisp salad, or fluffy rice all work wonderfully. This recipe is versatile and forgiving, so feel free to experiment with your preferred accompaniments. The crispy, juicy chicken will always be the star.
⏱ Time: 0 minutes
✓ Doneness: Meal plated attractively and ready to eat
Pro Tips
Always pat chicken skin dry before seasoning.
Removing surface moisture prevents steaming and helps the skin crisp up in the airfryer. If you skip this, the skin may turn rubbery or soggy instead of crispy.
Don’t overcrowd the airfryer basket.
Crowding blocks airflow, which is essential for even cooking and crisping. Leaving space around each piece ensures hot air can circulate properly.
Use a meat thermometer to check doneness.
Chicken thighs should reach 165°F internally to be safe but still juicy. Guessing can lead to undercooked or dry meat, so a thermometer guarantees perfect results.
Flip the chicken halfway through cooking.
This promotes even crisping on both sides and prevents burning. It also helps cook the meat through uniformly.
Let the chicken rest after cooking.
Resting allows juices to redistribute inside the meat, making it tender and juicy. Cutting too soon causes the juices to run out and dry meat.
Use bone-in, skin-on thighs for best texture.
The bone keeps meat moist during cooking, and the skin crisps up nicely in the airfryer. Boneless or skinless cuts don’t get the same effect.
Serve with fresh lemon wedges.
A squeeze of fresh lemon brightens the rich flavors and balances the savory seasoning, enhancing the overall taste.
Common Mistakes to Avoid
Skipping the drying step before seasoning.
Why it happens Many cooks assume seasoning alone is enough and overlook the importance of drying the skin first.
Fix Pat the chicken skin dry thoroughly with paper towels before adding oil and seasonings. This step ensures the skin crisps properly instead of steaming.
Overcrowding the airfryer basket.
Why it happens It’s tempting to fit all pieces at once to save time, but this reduces airflow.
Fix Cook in batches if needed, leaving space between pieces so hot air can circulate and crisp the skin evenly.
Not flipping the chicken during cooking.
Why it happens Some think flipping isn’t necessary and want to avoid opening the airfryer.
Fix Flip the thighs halfway through cooking to ensure both sides get crispy and the meat cooks evenly.
Cooking at too low temperature.
Why it happens Lower temps might seem safer but won’t crisp skin properly.
Fix Cook at 400°F to get that golden, crispy skin while keeping the meat juicy inside.
Cutting chicken immediately after cooking.
Why it happens Impatience or hunger leads to slicing right away, causing juices to escape.
Fix Let chicken rest for at least 5 minutes to keep it juicy and tender.
Variations
Spicy Lemon Pepper Chicken
Add 1/2 teaspoon cayenne pepper or chili flakes to the seasoning mix for a spicy kick. This variation adds warmth and depth without overpowering the lemon flavor. Expect a slightly bolder taste and a touch more heat on the palate.
Note: Adjust cooking time slightly if needed to prevent burning the spices; monitor closely during airfrying.
Herb-Infused Lemon Pepper Chicken
Mix in 1 teaspoon dried thyme or rosemary with the lemon pepper seasoning. The herbs add an earthy aroma and complexity that pairs beautifully with the citrus notes. This version feels a bit more rustic and aromatic.
Note: Use dried herbs finely crushed to ensure even coating and avoid overpowering the chicken.
Honey Lemon Pepper Glaze
Brush the chicken thighs with a thin layer of honey before cooking to create a sweet glaze that balances the zesty lemon pepper. The skin caramelizes slightly, adding a sticky, flavorful crust.
Note: Apply honey sparingly to avoid burning; consider lowering the airfryer temperature by 10°F if needed.
Lemon Pepper Chicken with Garlic Butter
After cooking, toss the chicken thighs with melted garlic butter for extra richness and flavor. This adds a luscious finish and makes the dish feel indulgent without complicating the process.
Note: Melt butter with minced garlic and spoon over the chicken immediately after resting.
Crispy Skinless Lemon Pepper Chicken
Use boneless, skinless chicken thighs and marinate them with lemon pepper seasoning and olive oil. The texture will be less crispy but still juicy and flavorful, perfect for those avoiding skin.
Note: Reduce cooking time by 5-7 minutes and check frequently to avoid drying out.
Nutrition
Per Serving:
Nutritional values are estimates and may vary based on specific ingredients used.
Storage & Tips
Room Temperature
Cooked chicken thighs can be safely left at room temperature for up to 2 hours if covered loosely with foil or a clean kitchen towel to prevent contamination. Avoid leaving them out longer to reduce food safety risks.
Refrigerator
Store cooked chicken thighs in an airtight container in the refrigerator for up to 4 days. The skin may soften when chilled, so reheat in the airfryer or oven to help restore crispiness before serving.
Freezer
Freeze cooked chicken thighs in a freezer-safe airtight container or heavy-duty zip-top bag for up to 3 months. Wrap tightly to prevent freezer burn. Thaw overnight in the refrigerator before reheating.
Reheating
Reheat chicken thighs in the airfryer at 350°F for 5-7 minutes to revive crispiness. Alternatively, use a 350°F oven for 10-12 minutes. Avoid microwaving as it can make the skin soggy. Add a splash of lemon juice after reheating for freshness.
Make Ahead
You can season and marinate the chicken thighs up to 24 hours ahead, stored covered in the fridge. When ready, cook directly from the fridge—just add 2-3 extra minutes to cooking time if needed.
FAQ
Can I use boneless chicken thighs for this recipe?
Yes, you can, but the texture will be different. Boneless thighs cook faster and won’t have crispy skin, so reduce the cooking time by about 5-7 minutes and keep an eye to avoid drying out. The flavor will still be delicious but less crispy.
How do I know when the chicken is cooked through?
The safest way is to use a meat thermometer; the internal temperature should reach 165°F (74°C). The juices should run clear when pierced, and the meat should feel firm but not dry.
Can I prepare the chicken ahead and cook later?
Yes, seasoning and marinating the chicken up to 24 hours in advance enhances flavor. Keep the chicken covered in the fridge and cook directly from cold, adding a few extra minutes to the cooking time.
Why isn’t my chicken skin crispy?
Common reasons include not drying the skin thoroughly before cooking, overcrowding the airfryer basket, or cooking at too low a temperature. Make sure to pat dry, space the pieces well, and cook at 400°F for best results.
What sides go well with this chicken?
Roasted vegetables, steamed green beans, a fresh salad, or fluffy rice all pair beautifully. The bright lemon pepper flavor complements simple, fresh sides that don’t overpower the chicken.
Can I add fresh garlic instead of garlic powder?
Fresh garlic can burn at high airfryer temperatures and turn bitter. If you want fresh garlic flavor, consider adding it after cooking by tossing the chicken in melted garlic butter or a garlic sauce.
Is this recipe gluten-free?
Yes, all ingredients used are naturally gluten-free. Just double-check your lemon pepper seasoning to ensure it doesn’t contain any hidden gluten additives.
How do I store and reheat leftovers?
Store leftovers in an airtight container in the fridge for up to 4 days. Reheat in the airfryer or oven to bring back crispiness. Avoid microwaving, as it will make the skin soggy.
Final Thoughts
Give this lemon pepper chicken thigh recipe a try and enjoy juicy, crispy chicken with minimal effort. I’d love to hear how it turns out for you—don’t forget to share your results!